Tag Archives: MMOexp

Path of Exile 3.28 League Start Build Guide and Rankings

Every new Path of Exile league is essentially a reset, and your first build plays a huge role in how quickly you gain momentum. A strong league starter should help you breeze through the campaign, enter maps without friction, and scale into tougher content without demanding expensive gear right away. With Patch 3.28 shifting balance and build performance, knowing which options deliver consistent early power is more important than ever.

Before looking at specific builds, it helps to understand what defines a top-tier starter. The best choices usually require minimal gear investment, level quickly through the story, handle early mapping efficiently, deal dependable damage to bosses, and transition smoothly into higher-tier content without hitting a progression wall.

With those factors in mind, here’s an updated breakdown of the strongest league starters.

S-Tier Starters (Top Performers)
Explosive Arrow Ballista Elementalist

This build continues to stand out thanks to its combination of safety and damage output. By placing ballista totems that attach explosive charges to enemies, it delivers powerful ignite damage without requiring you to stay in harm’s way.

Its bossing potential is especially impressive, even on a modest budget. Since it scales well with minimal gear, it’s a go-to option for players aiming to tackle endgame bosses early in the league.

Poisonous Concoction Pathfinder

Poisonous Concoction remains one of the smoothest starters available, largely because it doesn’t rely on a weapon. This removes a major gearing hurdle and makes early progression far more consistent.

The build excels at clearing packs through poison stacking while maintaining strong survivability via flask interactions. It’s a reliable, low-stress choice that performs well from leveling all the way into maps.

Lightning Arrow Deadeye

For players who value speed above all else, Lightning Arrow is a standout option. It clears large groups of enemies quickly, making it ideal for farming currency early on.Unlock infinite possibilities by harnessing the power of POE currency from MMOexp!

Deadeye enhances projectile performance, allowing the build to scale efficiently with basic gear. While its boss damage isn’t the strongest, its mapping speed makes it extremely effective for fast progression and farming strategies.

A-Tier Starters (Strong and Reliable)
Boneshatter Juggernaut

Boneshatter continues to be a solid melee option. Although the skill involves self-damage, Juggernaut’s defensive strengths make it manageable and forgiving.

This build offers excellent durability and respectable boss damage. While it may not match the clear speed of ranged builds early on, it becomes more efficient as your gear improves and remains a dependable choice throughout progression.

Cold Damage over Time Occultist

Cold DoT builds focus on steady, reliable damage rather than burst. This makes them particularly effective in longer encounters and boss fights.

They level smoothly, don’t require expensive gear, and provide strong defensive layers. It’s a great option for players who prefer a more controlled and methodical approach to combat.

B-Tier Starters (Good but More Niche)
Righteous Fire Inquisitor

Righteous Fire is popular for its simple and relaxed playstyle—activate the skill and deal damage passively to nearby enemies while sustaining your health.

It performs well in early mapping and is easy to learn, but scaling into higher-tier content can become more resource-intensive. Players may need to invest more heavily to maintain its effectiveness later on.

Summon Raging Spirits Guardian

This minion-based build offers solid damage and survivability, making it a viable league starter for those who enjoy summoner gameplay.

However, limitations in minion behavior and scaling can make it feel less consistent compared to higher-tier options. While still effective, it doesn’t reach the same level of efficiency as the top builds in 3.28.

Early League Farming Tips

Regardless of your build choice, generating currency early is key to progressing efficiently. Advancing your Atlas, focusing on mechanics like Essences, Expedition, and Harvest, and maintaining a consistent farming strategy can significantly boost your income.

Upgrading core gear pieces—such as weapons, jewelry, and six-link armor—can greatly improve your performance. Many players rely on trading early in the league to secure upgrades quickly, while others prioritize farming and crafting to build strength over time.Don’t let a Path of exile currency for sale shortage hold you back—get your currency at MMOexp now and thrive!

Transitioning Into Endgame

A well-chosen league starter should naturally lead into your long-term goals. Most builds tend to evolve into one of three roles:

Mapping-focused setups designed for fast currency farming

Boss-oriented builds built for high-end encounters

Starter builds that fund a second character with higher investment potential

Ultimately, the best league starter depends on what you want out of the league. Some players prioritize safety and bossing, others focus on speed and farming efficiency, while some prefer durable melee gameplay. Choosing a build that aligns with your playstyle will make your entire league experience far smoother and more enjoyable.

MLB The Show 26 Settings:A Complete Guide

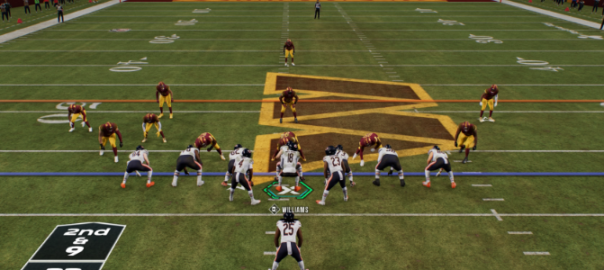
MLB The Show 26 is all about precision, and your settings play a major role in how well you perform. Whether you’re relaxing in offline modes or pushing for wins in Diamond Dynasty, dialing in the right configuration can noticeably improve your timing, control, and overall consistency.

Even small tweaks can make a big difference, helping you react faster, see pitches more clearly, and execute plays with confidence.

Why Settings Make a Difference

Baseball games demand sharp reactions and accurate inputs. The right setup enhances both visibility and responsiveness, allowing you to play at your best.

A well-tuned configuration can help you:

Read pitches earlier and more clearly

Improve swing timing at the plate

Deliver more accurate pitches

Minimize input delay

Adjust gameplay to suit your personal style

Many experienced players fine-tune their settings early to create a smoother experience throughout the season.

Best Batting Settings

Hitting is one of the most skill-intensive parts of the game, so optimizing your setup here is essential.

Hitting Interface

Zone Hitting is the top choice for players aiming to improve.

It gives you control over the PCI (Plate Coverage Indicator), allowing precise placement of your swing. While it takes time to master, it offers the most control and is widely used in competitive play.

Other options include:

Directional Hitting:Easier but less accurate
Timing Hitting:Focuses only on swing timing

If you’re serious about improving, Zone Hitting is the way to go.

PCI Settings

Your PCI setup directly affects how easily you can track pitches.

Suggested configuration:

PCI Center:Diamonds or Basic
PCI Inner:None or Fade
PCI Outer:None
PCI Color:Bright tones like cyan, yellow, or white

Using bright colors makes the PCI stand out against different stadium backgrounds and pitch speeds.

Batting Camera

Choosing the right camera angle improves pitch recognition and reaction time.

Popular options:

Strike Zone
Strike Zone 2
Strike Zone High

These views bring the action closer, making it easier to identify pitch types and adjust your swing.

Best Pitching Settings

Pitching success depends on control and consistency, both of which are heavily influenced by your settings.

Pitching Interface

Pinpoint Pitching is the most effective option for precision.

It rewards accurate input and timing, allowing you to consistently place pitches exactly where you want them. Once mastered, it provides the highest level of control.Turn every swing into a home run with MMOexp reliable MLB The Show 26 Stubs service—your shortcut to building a championship team.

Alternative options:

Meter Pitching
Pure Analog Pitching
Classic Pitching

These are easier to learn but don’t offer the same level of accuracy.

Pitching Camera

A clear camera angle helps you visualize pitch placement before release.

Recommended choices:

Pitcher Offset (balanced perspective)
Pitcher Zoom
Pitcher Wide

Each offers a slightly different feel, so choose the one that best suits your playstyle.

Best Fielding Settings

Strong defense is essential, especially in close games where one mistake can cost you.

Throwing Interface

Button Accuracy Throwing is the most reliable option.

It introduces a timing mechanic that improves throw precision and reduces errors, making it especially useful for double plays and long throws.

Other options include:

Button Throwing
Analog Throwing

However, Button Accuracy provides the best combination of control and consistency.

Best Baserunning Settings

Baserunning can become chaotic without proper controls, so a clean setup is important.

Recommended configuration:

Baserunning Interface:Button Select
Baserunning Decisions:Assist or Auto

This setup allows you to control individual runners efficiently, which is crucial for steals, tag-ups, and quick decisions.

Getting your settings right in MLB The Show 26 can dramatically improve your overall gameplay. From refining your batting interface to mastering pitching mechanics, every adjustment helps create a smoother, more responsive experience.Don’t let the grind slow you down—MMOexp delivers fast, safe, and affordable cheap MLB The Show 26 Stubs so you can focus on winning.

Once everything is dialed in, you’ll notice better timing, stronger control, and more consistent results—giving you a clear advantage whether you’re playing casually or competing online.

Madden 26 Game Guide – Season 7 & Team Diamond Overview

What’s up, fellas? Hope you’re having a fantastic day! Today we’re breaking down everything new in Madden 26, including Season 7, Team Diamond, flashbacks, and upcoming promos. Whether you’re looking to improve your roster quickly or save time, you might want to buy Madden 26 coins. Let’s dive in.

1. Team of the Year (TOTY) Completion Sets

· Issue Earlier Today: Completion sets were not rewarding players properly (no gold 97s or limited-time items).

· Current Status: Sets are now confirmed working. Players should receive rewards as intended.

Tips:

· TOTY completion sets are cheaper to finish now.

· You have roughly 1 month to complete them.

· Completed packs may appear in your unopened packs. Check your inbox if you finished early today.

· Recommendation: Complete these sets to get 97 overall goals or 98 limited-time players.

2. Events & Event Players

· Current Bug: No event or CPU event players are currently obtainable.

· Example: 8-0 in an online event yields 125,000 coins but no Season 6 event token.

· Advice: Skip current events until the new Ring of Honor event drops.

3. Season 7 Overview

· Field Pass Rewards: Standard Madden 26 setup. Weekly challenges are active—complete them for rewards.

· Notable Players to Max Out:

1. Brandon Marshall – 6’5” wide receiver, top-tier stats.

2. Joe Thomas – Best offensive lineman in the game.

3. Demarcus Ware – Excellent defensive lineman (non-LTD/97 gold).

4. Eric Dickerson – Good card, but not optimal to max first.

5. Tip: Every Season 7 card is worth maxing out for your team. Focus on top-tier positional upgrades first.

4. Team Diamond

· Overview: Not strictly a money grab, but some packs feel expensive. Avoid special offers with low odds.

· Best Value: $15 premium field pass offers better value than random packs.

Player Acquisition:

· Each Team Diamond player has a 99 overall limited-time and a 98 overall champion.

· 99 Limited-Time: Exchange a specific champion + 4 division tokens.

· Division Tokens: Earned by completing division-specific 98 overall sets (e.g., NFC West).

· 98 Champion: Part of sets rewarding single tier-7 ability bucket and times-two to theme team.

Recommended Players:

· Cordary Stewart – Debatably the best QB.

· Champ Bailey – Solid corner.

· Limited-time Brandon Sheriff – Worth investing if upgrading your theme team.

· Caution: Many players may not justify their coin cost for backup roles.

· Tip: Complete Team Diamond solo challenges for team builder players—they’re a cost-effective way to progress.

5. Flashbacks

· Latest Update: EA added a new catalog tab to filter newest flashbacks.

Highlights:

· 98 overall flashbacks are strong.

· Limited-time flashbacks are rare and expensive, not always the best value.

· Menu Performance: Filtering and catalog navigation have improved significantly.

6. Promo & Leak Outlook

1. Ring of Honor Promo:

· Expected tomorrow. Includes 99 overall and other tiered cards.

· Likely inductees: Calvin Johnson, Richard Sherman, Aaron Donald, Larry Allen, Mike Alott.

2. Upcoming Promos:

· Golden Tickets: Expected in 4-5 weeks, with drawing mechanics.

· All-Star Athletes: Potentially Bo Jackson, Anthony Edwards, LeBron James.

· Sugar Rush: Easter-themed promo, spring version of Christmas promo.

· Draft Promo (April): First look at 99 overall rookies; good for rookie team building.

· Madden 27 Pre-Order Bundle: Typically announced around the draft promo. Watch for the Mendoza pre-order pack.

7. General Tips

1. Max out top-tier Season 7 players first (position matters).

2. Skip current events until Ring of Honor officially launches.

3. Be cautious with packs—premium field pass is more reliable than Team Diamond special packs.

4. Complete solo challenges for team builder players—they’re cheap and effective.

5. Monitor leaks for upcoming promos like Golden Tickets, Sugar Rush, and Draft to plan coins and purchases.

Conclusion

Season 7 and Team Diamond provide exciting opportunities for roster upgrades, but patience is key. Focus on high-value cards, complete your field pass and solo challenges, and if you want to accelerate your progress, you can buy cheap Madden nfl 26 coins from trusted sources like MMOEXP to get a leg up. Madden 26 has a big few weeks ahead with Ring of Honor and other promos incoming.

ARC Raiders Latest Update:Patch Overview

ARC Raiders has received one of its most impactful updates yet, delivering a sweeping mix of new systems, balance adjustments, and technical improvements. This patch expands core gameplay with advanced matchmaking options, introduces a permanent progression project, refreshes maps and loot logic, and resolves a long list of long-standing bugs. The result is a smoother, more competitive experience that rewards mastery without leaving newer or casual players behind.

From intense PvP challenges to long-term goals that persist across wipes, this update meaningfully reshapes how Raiders approach Expeditions.

Solo vs Squads:A New PvP Challenge for Veterans

At the center of this update is Solo vs Squads, a high-risk matchmaking option built specifically for confident, experienced players.

Entry Requirements

Available to solo players at level 40 or higher

How It Functions

A new toggle appears above matchmaking

When enabled, solo players enter the Squads queue alone, facing full teams

Progression Incentive

20% bonus XP awarded at the end of the match

Bonus applies whether you extract or fall in combat

Solo vs Squads is designed to push mechanical skill, tactical awareness, and decision-making to the limit. Facing coordinated groups alone dramatically increases danger, but the added XP makes it a compelling option for veterans chasing faster progression.

Known Limitation:The game currently does not notify players when the option unlocks at level 40, so eligible Raiders must manually check for it.

Trophy Display:Permanent Endgame Progression

The update introduces the Trophy Display, a long-term project focused on defeating powerful ARC threats. Structurally similar to the Candleberry Project, it shifts attention toward hunting and collecting rare enemy components.From casual runs to high-stakes battles, MMOexp has the ARC Raiders Items you need to thrive.

How It Works

Collect ARC enemy parts during Expeditions

Submit them to upgrade a central Display Case

The project progresses through five distinct tiers

Each tier visually expands the display with new elements

Rewards by Progression Tier

Every upgrade stage grants:

Blueprints

Raider Tokens

Completing the full display unlocks:

Howl emote

Guitar

300,000 Coins

Unlike seasonal content, the Trophy Display has no expiration date and remains unaffected by Expedition resets, making it a true long-term objective for dedicated players.

New Gear and Quest Content

Progression variety also expands with new collectible content:

2 new Epic Augment types

7 additional quests

These additions encourage experimentation with new builds and give players clearer goals during runs. The introduction of stronger augments naturally increases the value of optimized gear, making it more appealing for high-end players to seek out or buy ARC Raiders Items when tackling tougher encounters.

Party, Social, and Accessibility Enhancements

Several quality-of-life improvements focus on smoother group play and better input customization.

Open Parties

Parties can now be set to open

Friends can join freely—even mid-session

Late joiners are placed into the next available match

Expanded Squad Invites

Any squad member can invite players

No longer restricted to party leaders

Input and Control Updates

Optional mouse smoothing added

Full controller rebinding now supported

Aim assist behavior standardized across different frame rates

These changes reduce friction in both solo and group play, especially for mixed-input squads.

Enemy AI and Combat Readability Improvements

Enemy behavior has been refined to improve clarity, fairness, and consistency:

ARC units navigate obstacles more reliably

Leapers move more naturally after losing a leg

Shredder corpses correctly appear as lootable

Snitches stop producing sound after destruction and no longer interrupt calls incorrectly

Spotters no longer chase players indoors

Tick now allows a brief dodge-roll timing window to shake it off

Together, these adjustments make encounters easier to read and less frustrating without reducing challenge.

Map Fixes and Loot Rebalancing

All major maps received targeted improvements to loot logic, collision, and environmental bugs.

Global Changes

Reduced blueprint container spawns in specific scenarios

Increased odds of higher-tier weapons in weapon cases

Adjusted unique part drop rates for Matriarchs and Queens

Fixed dozens of containers that could not previously be interacted with

Map-Specific Updates

Dam Battlegrounds:Collision issues and stuck areas removed

Buried City:Invisible walls eliminated, musical puzzle removed

Spaceport:Floating objects corrected, ARC spawns rebalanced

Stella Montis Highlights

Seed Vault extraction exploit fixed

Night Raid lighting improved

Over 40 stuck locations resolved

Loot distribution refined for better flow

UI, Audio, and Performance Polishing

This update marks a major step forward for ARC Raiders. Solo vs Squads raises the PvP skill ceiling, the Trophy Display establishes a permanent endgame chase, and hundreds of fixes dramatically improve stability and fairness. With deeper progression, cleaner combat, and more reliable performance, the game is now in its most polished and engaging state to date.Upgrade your arsenal instantly—choose MMOexp for reliable buy ARC Raiders Items and unstoppable gameplay.

The Nightmare Boss Explained:Call of Duty Black Ops 7

Call of Duty:Black Ops 7 delivers some of the most demanding encounters the series has ever seen, and none test your mechanics quite like The Nightmare.This late-campaign boss fight combines precision shooting, constant movement, and relentless enemy pressure into one chaotic battle.Whether you’re tackling it solo or sharpening your skills in CoD Black Ops 7 Bot Lobbies beforehand, understanding each phase is the difference between survival and repeated failure.

The Nightmare appears during a late-game campaign mission and serves as a major skill check before the story final stretch.By this point, the game expects you to master positioning, weak-point targeting, and crowd control—all of which are pushed to their limits here.

The Nightmare is a massive, stationary plant-like creature that cannot be damaged directly.Instead, the battle revolves around rotating weak points, immunity phases, and waves of summoned enemies.Shooting the wrong targets wastes ammo and time, so success hinges on discipline and target priority.

Phase 1:Eliminate the Small Flower Buds

At the start of the fight, several small flower buds are visible along the boss’s stalk.These buds resemble enemies you’ve already encountered earlier in the mission—and they are your only damage source in this phase.

Phase 1 Strategy

Focus exclusively on the smaller buds

Each destroyed bud removes a significant portion of the boss health

Maintain distance and constantly reposition to avoid incoming attacks

Best Weapons for Phase 1

Sniper Rifles

Designated Marksman Rifles (DMRs)

Long-range Assault Rifles

Accuracy and range matter more than raw fire rate here.

Nightmare Attacks During Phase 1

While you target the buds, the boss cycles through two primary attacks:

Poison Breath

A wide cloud of toxic gas that:

Deals heavy damage

Knocks you backward

Forces you out of position

Counter:Use tall environmental objects for cover and duck behind them just before the gas reaches you.

Homing Projectile Pods

Slow-moving glowing orbs that track your movement.

Counter options:

Sprint away to break line of sight

Shoot the projectiles before they reach you

Do not let them stack up behind you—this is how players get trapped.

Once all small buds are destroyed, The Nightmare becomes immune and transitions to the next phase.

Phase 2:Survive the Summoned Enemy Waves

With its shield active, the boss calls in multiple enemy types:

Standard zombies

Mutant spiders

Occasional explosive enemies

Your Goal

Survive until the immunity shield drops.

Survival Tips

Never stop moving—standing still leads to instant swarms

Use grenades, field upgrades, and abilities to thin groups

Save rifle ammo by relying on SMGs, shotguns, or explosives

When the shield fades, a new set of flower buds appears.Destroy them again while continuing to manage enemy pressure.

Many players practice this phase in Black Ops 7 Bot Lobbies to refine movement routes and crowd control before attempting it in the campaign.Whether you’re new to Black Ops 7 or pushing advanced techniques, MMOexp cheap Black Ops 7 Bot Lobbies provide a stress-free environment to learn, practice, and improve at your own pace.

Phase 3:Destroy the Glowing Orange Weak Points (Final Phase)

Once The Nightmare drops to roughly 30% health, the fight enters its final stage.No more small buds appear.Instead, three massive flower mouths open across the boss body.

How the Final Weak Points Work

Each flower mouth glows bright orange before attacking

The glow signals a short damage window

Shooting the glowing mouth deals massive damage

Final Phase Survival Strategy

This phase throws everything at you simultaneously:

Poison breath

Tracking projectiles

Endless zombie spawns

Key Tips

Rotate between cover constantly

Do not tunnel-vision on weak points-clear enemies first

Fire only when a flower mouth is glowing

Recommended Ability:Grenade Launcher

Massive area-of-effect damage

Instantly clears zombie clusters

Deals heavy damage to glowing weak points

If you’ve been conserving explosives, this is the moment to unleash them.

Ending the Fight

When enough damage is dealt to a giant flower mouth:

It wilts

Stops glowing

Becomes immune

This signals you to shift focus to the next weak point.After all three flower mouths are disabled, The Nightmare collapses, triggering a cutscene and completing the mission.

Tips to Make the Nightmare Fight Easier

1.Stay mobile at all times

2.Always prioritize weak points

3.Save explosives for the final phase

4.Use precision weapons early, burst damage late

5.Thin zombie waves quickly

6.Use cover intelligently to counter poison attacks

The Nightmare is one of the most inventive boss fights in Call of Duty:Black Ops 7.By combining weak-point mechanics, survival waves, and environmental threats, it forces players to slow down and play tactically—something rare for the franchise campaign missions.With smart positioning, controlled aggression, and the right loadout, this towering plant monstrosity will fall, clearing your path toward the campaign finale.