Category Archives: Diablo 4

Diablo 4 Season 9: Best Spiritborn Build – Jaguar with Balazan Poison Rake

Diablo 4 Season 9 has introduced several powerhouse builds across all classes, and one of the most surprising among them is the Jaguar Spiritborn with Balazan Maxtlatl. This Poison-focused Thorns build isn’t meta in the traditional sense. Still, with the right setup, it easily rivals (and often outpaces) more conventional choices, especially in AoE mob clearing and endgame Thorns scaling.

In this guide, we break down everything you need to know to build and master Balazan’s Poison Rake Spiritborn, from leveling to final gear, Paragon, Spellcrafting, Diablo 4 Items, and more.Gear up faster, fight harder — buy Diablo 4 gold from MMOexp and dominate Sanctuary today!

Pros and Cons of Balazan Poison Rake Spiritborn

Pros:

Insane AoE damage via Poison DoT and Thorns
Jaguar Spirit skill synergy allows incredible mobility
Strong synergy with Spirit Halls and key items like Razorplate
Dominates large mob packs with Vortex + Catalyst combo

Cons:

Low survivability without optimized Barrier stacking
Needs specific Uniques (Balazan’s Maxtlatl, Razorplate) to truly shine
Requires over 150% Attack Speed for endgame viability
High dependency on cooldown and Ferocity management

How to Play the Build: Skill Rotation

1.Engage with Vortex to pull enemies together and knock them down.

2.Spam Rake to stack Ferocity and deal direct damage – each cast triggers Thorns with Balazan.

3.Activate Armored Hide, Toxic Skin, and Ravager to increase Thorns, Poison damage, and durability.

4.Use The Hunter to summon the Jaguar Spirit and dart between enemies for instant, bursty damage.

5.Position inside Mystic Circles (via Aspect of Plains Power) to maximize Ferocity and damage output.

6.Use Catalyst + Corrosive Vapor + Ocular Rune from Spellcrafting to obliterate groups.

    Leveling Guide – Skill Point Progression

    The goal during leveling is to stack Thorns and Poison DoT while scaling Ferocity through Jaguar skills:

    Early Levels (2-15)

    Thrash → Enhanced Thrash
    Vortex → Enhanced + Replenishing Vortex
    Start building Mirage, Unrestrained Power, Focal Point, Apex

    Mid Game (16-32)

    Ravager, Enhanced Ravager
    Toxic Skin, Enhanced + Replenishing Toxic Skin
    Build Endurance, Patient Guard, Auspicious, Bastion

    Pre-Endgame (33-60)

    Nourishment, Potent, Resolution, Supremacy
    Unlock The Hunter and its upgrades (Harmonious, Exalted)
    Get Noxious Resonance (Key Passive) and Rake + Advantageous Rake

    Endgame Tuning (61-72)

    Perseverance, Velocity, Furnace
    Armored Hide, Measured Ravager

    Spirit Hall Setup: Jaguar Focused

    Primary Spirit: Jaguar

    Every 15th Jaguar Skill attack echoes 15% of your last damage.
    All skills become Jaguar skills, enabling massive synergy with Hunter + Rake.

    Secondary Spirit: Jaguar

    Increases Ferocity cap and stacking rate from kills or boss hits.

    Best Gear & Uniques

    You can go to Eld.gg to buy D4 materials to help you upgrade:

    1.Balazan Maxtlatl (Chest)

      The centerpiece of this build.
      Converts Thorns to Poison and scales Poisoning up to 300%.

      2.Razorplate (Chest)

        Insane Thorns stacking.
        Enables Balazan passive to reach full potential.

        3.Loyalty Mantle

          Boosts all Spirit Hall bonuses by 100% if matched.
          Reduces cooldown and cost of Jaguar skills.

          Key Legendary Aspects

          Aspect of Wild Claws: Rake summons a Spirit Jaguar that also attacks.
          Duelist Aspect: Increases Ferocity max cap.
          Plains Power: Create Mystic Circles to boost Ferocity and overall damage.
          Vehement Brawler Aspect: Buff damage after Ultimate skill (Hunter).
          Conceited Aspect: Bonus damage with Barrier active.

          Alternative Ring: Ring of Starless Skies – grants resource efficiency and burst potential.

          Horadric Jewelry & Spellcrafting

          Jewelry:

          1.Seal of Denial: Massive Thorns and Barrier boost.

          2.Tyrant Bane: DoT amplification – stacks infinitely.

          3.Idol From Below: Bonus stats, but makes you a hunted target in dark zones.

            Gems:

            Grand Emerald: Boosts Dexterity for scaling damage and survivability.

            Runewords:

            NeoQax: Huge instant damage at the cost of all resources.
            IgniJah: Replaces evade with teleport – critical for mobility.
            TamQue: Grants Earthen Bulwark for added defense.

            Spellcraft Combo:

            Catalyst: Celestial Surge – pulls and nukes enemies in Ocular Rune.
            Infusion: Corrosive Vapor – converts Catalyst into Poison DoT.

            Arcana: Floaty Bobble, Gleaming Conduit, Jagged BrambleThe Balazan Poison Rake Spiritborn build is one of the most exciting off-meta picks in Diablo 4 Season 9. It takes everything fun about the Spiritborn – mobility, rapid strikes, and raw Thorns damage – and amplifies it with Poisonous burst potential that scales explosively in group fights.Trusted by thousands of players — MMOexp delivers cheap Diablo IV Items fast, safe, and always on time.

            If you love high-speed gameplay, big poison numbers, and complex interactions between gear, skills, and mechanics, this build is worth a try.
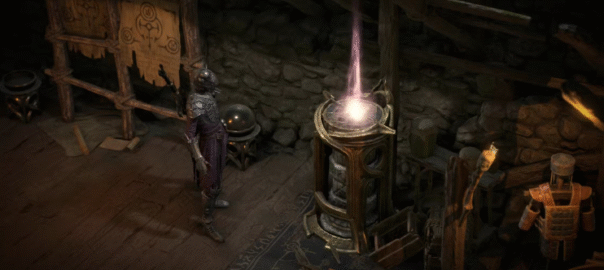
            Diablo 4: Horadric Spellcrafting Guide

            In the world of Diablo 4, the Horadric Spellcrafting system introduces a new layer of customization and depth to the game’s already intricate combat mechanics. Through this system, players can further hone their characters’ abilities, shaping the spells, Diablo 4 Items and abilities they use in battle to match their unique playstyle. Horadric Spellcrafting, however, is not just about increasing damage output or making your character more powerful. It’s about truly tailoring your gameplay experience to suit your desires, whether you prefer to focus on survivability, damage output, or versatility.

            In this comprehensive guide, we will explore Horadric Spellcrafting in detail, from its basic concepts to the more advanced intricacies. By the end, you should have a clear understanding of how to use this system to its fullest potential, empowering your character to overcome the many challenges in Diablo 4.

            1. What is Horadric Spellcrafting?

            Horadric Spellcrafting is an advanced system in Diablo 4 that allows players to craft and enhance spells using magical components known as Runes and Sigils. This system lets you modify your abilities in a way that’s more versatile and dynamic than traditional skill trees. While skill trees give you predefined paths for upgrading your character’s abilities, Spellcrafting adds an extra layer of customization by enabling you to apply specific modifications to your skills and spells.

            The Horadric Spellcrafting system draws inspiration from the Horadrim, the ancient order of mages who were instrumental in the struggle against the Prime Evils. The Horadrim left behind many powerful secrets, and players can tap into these ancient magics by engaging in the crafting process.

            The crafting process involves the use of a special Horadric Altar, where you can combine various resources to alter your existing skills. These resources include:

            Runes: Magical symbols that modify the behavior of a skill. Runes are used to alter the effect, damage, duration, and other parameters of a spell.

            Sigils: Special artifacts that can be used to grant powerful buffs or even completely change how a spell behaves. Sigils are rarer than Runes and have a much stronger impact on the crafting process.

            By combining Runes and Sigils in different ways, you can create a wide variety of new effects for your skills, allowing for endless customization possibilities.

            2. How to Access Horadric Spellcrafting

            To start utilizing Horadric Spellcrafting, you first need to unlock it in the game. Here’s how you can get started:

            Reach the Endgame: Horadric Spellcrafting becomes available once you reach the endgame content in Diablo 4. This ensures that only players who have invested significant time into the game can access this advanced system.

            Find the Horadric Altar: The Horadric Altar is the hub for all your crafting activities. It can be found in a specific area of the endgame map. Players will have to complete specific tasks or quests to gain access to the altar.

            Collect Resources: Runes and Sigils are scattered throughout the world, often as rewards for completing dungeons, quests, or defeating elite enemies. The more resources you gather, the more options you have when crafting your spells.

            3. Runes: The Building Blocks of Spellcrafting

            Runes are the core elements used in Horadric Spellcrafting. Each Rune has its own unique effect, and when combined with a skill, it modifies that skill’s properties. The impact of a Rune can range from simple stat boosts to major alterations in how the skill works.

            Types of Runes

            Elemental Runes: These Runes imbue your abilities with elemental properties such as Fire, Ice, Lightning, and Poison. For example, a Fire Rune might turn your normal fireball spell into a powerful AoE (area of effect) flame burst that leaves a burning ground effect.

            Damage Runes: These Runes enhance the raw damage output of your skills. They can increase the scaling of your spells, adding bonus damage based on factors like your character’s attributes or even the number of enemies hit.

            Utility Runes: Utility Runes are focused on providing additional benefits during combat. They can increase healing effects, reduce cooldowns, or add defensive capabilities to your skills. A defensive Rune could, for example, grant you a shield every time you cast a certain ability.

            Control Runes: These Runes change the crowd control properties of your abilities. For instance, a Stun Rune could cause your skill to not only damage but also stun enemies in the area for a few seconds.

            Crafting with Runes

            When you craft with Runes, you essentially modify the base ability of your character’s skill. For example, if your character uses a basic Fireball, you might combine it with a Chain Rune to make the fireball bounce between enemies. Similarly, a Slow Rune could cause your fireball to also slow enemies in its path, providing you with more control over the battlefield.

            Players can experiment with different combinations of Runes and test their outcomes. Some may seem simple, but with the right combination, they can unlock synergies that drastically change your playstyle.

            4. Sigils: Powerful Modifications

            Sigils are the rarest and most potent crafting items in the Horadric Spellcrafting system. Unlike Runes, which are relatively common, Sigils can have a wide range of effects and dramatically alter the behavior of your spells.

            Types of Sigils

            Affliction Sigils: These Sigils grant your skills the ability to inflict status ailments on enemies, such as burning, freezing, or poisoning. For example, a Frost Sigil could turn a Fireball into a Frostball that freezes enemies in its wake.

            Summoning Sigils: These Sigils allow you to summon creatures or objects that assist in combat. For example, a Summon Golem Sigil might cause your Earthquake ability to summon a temporary Golem that deals additional damage and tanks enemy hits.

            Ultimate Sigils: These are incredibly rare Sigils that alter an ability’s ultimate form. For instance, an Inferno Sigil could enhance your Meteor spell, transforming it from a single impact into an explosive AoE damage dealer that rains meteors across the battlefield.

            Defensive Sigils: These Sigils give your character or abilities defensive buffs, such as increased armor, resistance, or healing. A Shield Sigil could cause your Barrier skill to create a massive shield that absorbs all incoming damage for a brief period.

            Combining Sigils with Runes

            The real power of Horadric Spellcrafting comes when you combine both Sigils and Runes. A simple Fireball can be made to bounce, chain between targets, and apply both burning and freezing effects with the right combination of Sigils and Runes. The crafting process opens up nearly endless combinations that let you tailor your character to your preferred combat style.

            5. Best Practices for Horadric Spellcrafting

            Now that you understand the basics of Horadric Spellcrafting, it’s time to dive into how to optimize this system for your character. Here are a few tips and best practices to get the most out of your crafting efforts:

            Experiment with Synergies: Don’t just aim for raw damage; think about synergies between your skills. For example, pairing a Slow Rune with a Poison Sigil could allow you to trap enemies in a slow-moving poison field, keeping them in place long enough for your poison to do its work.

            Adapt to Your Playstyle: Whether you prefer to be in the front lines, casting from a distance, or supporting your allies, Horadric Spellcrafting gives you the flexibility to tailor your skills to your preferences. If you’re more of a tanky player, for instance, you could focus on crafting defensive runes and sigils that enhance your survivability.

            Resource Management: Runes and Sigils can be hard to come by, so make sure you use them wisely. You don’t need to craft every ability at once—focus on a few key skills and upgrade them incrementally as you acquire more resources.

            Consider Team Composition: In group play, Horadric Spellcrafting can be used to complement your allies’ abilities. If your team lacks crowd control or healing, consider crafting spells that can fill those gaps.

            Experiment with Endgame Builds: As you unlock more powerful crafting options in the late game, don’t be afraid to experiment with builds. You might discover combinations that offer even greater synergy, enabling you to unleash devastating combos or become a much more versatile support character.

            6. Conclusion

            Horadric Spellcrafting in Diablo 4 is an exciting addition that offers unparalleled customization for your character’s abilities. The ability to modify and craft spells with Runes and Sigils allows for immense creativity and experimentation. By unlocking the power of the Horadrim’s ancient secrets, players can create unique spellcasting builds that match their preferred playstyle and tackle the game’s challenges with new strategies and tactics, buy Diablo 4 Gold directly can help you get a faster gaming experience.

            Whether you are a seasoned Diablo veteran or a newcomer to the franchise, Horadric Spellcrafting is a system that rewards experimentation and strategic thinking. Unlock the power of the Horadrim, craft your spells with care, and prepare for an unforgettable journey through Diablo 4’s dark and dangerous world.

            How to Beat Diablo 4 Pinch of Poison for an Elixir Recipe

            In Diablo 4, elixirs are potent consumable items that provide players with various buffs to enhance their combat abilities, grant resistances, or boost survivability. Among the various ingredients that are used to craft these powerful elixirs, the “Pinch of Poison” is a key component for certain elixir recipes. However, obtaining this elusive item is not always straightforward. Players need to face certain challenges and enemies that drop it, often leading to frustration if the right steps aren’t followed.

            This article will walk you through everything you need to know about how to beat the Pinch of Poison in Diablo 4, including its significance in elixir crafting, where to find it, and how to increase your chances of obtaining it. Whether you’re a seasoned veteran or new to the game, this guide will ensure that you’re well-equipped to handle the challenges ahead.

            What Is a Pinch of Poison?

            The Pinch of Poison is a rare crafting Diablo 4 materials, used in the creation of various elixirs that grant powerful buffs to players. Specifically, these elixirs can provide enhancements to poison resistance, health regeneration, or damage mitigation against certain types of enemies, making them crucial for players dealing with specific content or hostile environments.

            The Pinch of Poison is typically not something that can be easily purchased from vendors or found in the wild. Instead, it must be obtained through defeating specific enemies, completing certain quests, or gathering it as a reward for progressing through particular zones. While it may seem like a small and insignificant item, its role in crafting high-tier elixirs makes it a highly coveted ingredient.

            The Role of Elixirs in Diablo 4

            Before diving into how to beat the Pinch of Poison, it’s essential to understand the role of elixirs in Diablo 4. These consumables can be used strategically to improve a player’s stats, resistances, or abilities for a limited time. For example, some elixirs may grant poison resistance or increase the player’s poison damage output, while others might enhance defense or boost damage against elite enemies.

            Elixirs are especially important in higher-level play, where tough bosses and dangerous areas pose significant challenges. Many players use elixirs as part of their overall strategy to ensure that they can survive and thrive in these high-stakes encounters. As a result, knowing how to obtain the ingredients for crafting these elixirs, including the Pinch of Poison, is essential for any serious player.

            Where to Find the Pinch of Poison

            The Pinch of Poison is dropped by specific enemies that are found in various areas across the world of Sanctuary. While it’s not an item that can be farmed in any location, certain regions are more likely to yield it. Understanding the best places to look for these enemies and how to efficiently farm them is key to obtaining the Pinch of Poison.

            1. Poisonous Creatures and Monsters

            The best place to start looking for a Pinch of Poison is by seeking out monsters that have poison-based attacks or are otherwise associated with toxic environments. These creatures can often be found in swampy areas, caves, or locations with high levels of environmental hazards.

            Swamp Areas and Marshes: Many of the game’s swamp-themed zones feature monsters that deal poison damage. These are prime locations to find enemies that drop the Pinch of Poison. Areas such as The Mire or The Blighted Pools are some of the most notorious for such monsters.

            Poisonous Bosses: Specific boss fights can also drop Pinch of Poison. These bosses typically have poison attacks or unique mechanics related to toxins. The drop rate for the Pinch of Poison from bosses is higher, but they are also more difficult to defeat.

            Toxic Slimes and Corrupted Creatures: Slime creatures and corrupted wildlife that have undergone poison-based mutations can often be found in areas steeped in corruption or arcane poison. These enemies are often located in Diablo 4’s dark, twisted dungeons or caves.

            2. Poison-Focused Zones

            While enemies are your primary source of a Pinch of Poison, there are certain areas of the map where these types of creatures appear more frequently. Many of these areas are designed with environmental hazards, such as poison clouds, toxic water, or infected swamps, which further intensify the challenge of defeating these foes. Notable zones include:

            The Weeping Swamp: A vast area filled with poison-spitting enemies, perfect for farming the Pinch of Poison.

            Scorched Hollow: This location features toxic hazards as well as corrupted enemies that can drop valuable materials, including the elusive Pinch of Poison.

            It’s important to use proper strategy when exploring these zones. Be sure to bring along enough antidotes or poison resistance elixirs to handle the environmental dangers.

            How to Increase Your Chances of Obtaining a Pinch of Poison

            Now that you know where to find the Pinch of Poison, it’s essential to discuss how you can increase your chances of getting it. Farming for rare ingredients in Diablo 4 can sometimes feel like a grind, but there are ways to make the process more efficient and rewarding.

            1. Use Increased Drop Rate Buffs

            In Diablo 4, there are certain passive abilities, items, or potions that can increase the drop rate of rare materials like the Pinch of Poison. If you’re specifically farming for this ingredient, it’s worth considering equipping items or abilities that boost your loot chances. Some buffs or modifiers may increase the likelihood of crafting material drops, especially when defeating bosses or elite monsters.

            2. Complete Poison-Themed Events

            Throughout Diablo 4, there are specific world events or activities tied to poison or corruption. Participating in these events may increase the number of poison-themed creatures you encounter, boosting your chances of obtaining the Pinch of Poison. Look for events in the game world that feature creatures or areas where poison is a central theme.

            3. Farm Elite Monsters and Rare Bosses

            Elite monsters or rare bosses are known for dropping higher-quality loot compared to regular enemies. They also have a much higher chance of dropping specific crafting materials like the Pinch of Poison. These enemies are typically harder to defeat, but with the right strategy, you can efficiently farm them for the cheap Diablo IV Items you need.

            4. Group Farming

            Farming in groups can be highly effective when it comes to gathering rare materials. Grouping up allows you to tackle tougher enemies and events more efficiently. If you’re farming an area known for Pinch of Poison drops, team up with other players to increase the overall speed and success rate of your farming sessions.

            Strategies for Defeating Poison-Based Enemies

            As you venture into toxic areas or confront enemies that deal poison damage, it’s crucial to prepare your character with the right strategy. Poison-based creatures can inflict debilitating status effects on your character, making it harder to survive and deal damage. Here are some key tips to defeat these enemies:

            1. Gear Up for Poison Resistance

            If you’re venturing into toxic zones or taking on poison-dealing enemies, be sure to equip gear that offers poison resistance. There are specific armor sets, rings, or amulets that grant this resistance, helping mitigate the damage you take from poisonous attacks.

            2. Bring Antidotes or Elixirs

            Antidotes and poison resistance elixirs are invaluable when you’re up against poison-themed enemies. Stock up on these consumables and use them strategically to avoid being overwhelmed by status effects.

            3. Utilize Poison-Resistant Companions

            In Diablo 4, companions such as wolves or ravens can provide support in combat. Make sure to choose companions that either deal poison damage to enemies or possess abilities that can mitigate the effects of poison.

            4. Move Swiftly and Keep Your Distance

            Many poison-based enemies rely on area-of-effect poison clouds or poison projectiles. Staying mobile and avoiding these attacks is key to surviving these encounters. Consider using ranged attacks or crowd-control abilities to keep your distance from enemies while dealing damage.

            Conclusion

            The Pinch of Poison may seem like a minor ingredient in the grand scheme of Diablo 4, but its significance in crafting elixirs that provide vital buffs cannot be underestimated. Whether you’re tackling difficult bosses, exploring dangerous toxic zones, or engaging in group farming, understanding how to obtain and use the Pinch of Poison will greatly enhance your survival and success in the game.

            Remember to focus on the right farming locations, increase your chances with loot-enhancing buffs, and prepare adequately for poison-based enemies. By doing so, you’ll be able to craft the elixirs you need to take on even the toughest challenges that Diablo 4 has to offer.

            Happy hunting, and may your poison resistance be high and your drops plentiful!

            Diablo 4: Turbulent Waters Quest Walkthrough

            In Diablo 4, one of the most intense and rewarding parts of the game is the questing experience, which takes you through the dark and dangerous world of Sanctuary. As you traverse through this world, you’ll be given tasks that not only advance the story but also challenge your combat skills and puzzle-solving abilities. One such quest that will keep you on the edge of your seat is the Turbulent Waters quest, which requires both strategic thinking and the use of your combat abilities.

            In this article, we will walk you through the Turbulent Waters Quest, a major story quest in Diablo 4 Gold, providing tips and insights on how to successfully complete it. The quest is tied to a deeper segment of the game’s narrative, and the challenges it presents are multifaceted. Whether you’re a seasoned adventurer or new to the game, our detailed walkthrough will help you make your way through the treacherous waters of Sanctuary.

            Overview of the Turbulent Waters Quest

            The Turbulent Waters quest is part of the main story arc in Diablo 4. It involves helping characters, solving environmental challenges, and battling enemies in a region with harsh and unpredictable conditions. The quest is set in one of the more treacherous areas of the game, which is prone to environmental hazards and enemy ambushes. The quest is crucial in revealing more about the game’s deeper lore, as well as further advancing your understanding of the struggles the world of Sanctuary is facing.

            The quest begins as you encounter a troubling situation with the Rogue faction and the forces of Kehjistan, a land known for its unforgiving environment. Players must take on a series of challenges that involve traversing through dangerous zones filled with hostile creatures, treacherous waters, and environmental puzzles. The key elements of the quest revolve around solving puzzles, defeating difficult enemies, and understanding the lore of the ancient forces at play.

            Starting the Turbulent Waters Quest

            To begin the Turbulent Waters quest, you must first have progressed far enough in the main story. You will receive the quest from a major NPC or quest-giver in the area where this story unfolds. The quest begins in the Coastline region, and you’ll need to interact with Elder Vulgari, a figure connected to the ongoing struggle against Chaos Forces.

            Once you accept the quest, the path will not be entirely straightforward, and you will be required to navigate through dangerous zones filled with monsters, as well as harsh environmental challenges.

            Navigating the Coastal Region and Facing Environmental Challenges

            The quest takes you into the Coastal Region, a location teeming with various environmental hazards. The coastline is characterized by rocky shores, dangerous cliffs, and unpredictable waves that can knock you off course if you’re not careful. Here are some tips for navigating through this area:

            Watch the Tides: The coastal region is prone to rising tides. While you may be able to cross certain paths during low tide, the area becomes impassable during high tide. Time your movements wisely and plan your route to ensure you are not caught when the tides rise.

            Deal with Hostile Fauna: The area is rife with dangerous creatures, including Murlocs, Sea Beasts, and other aquatic horrors. These creatures are formidable, so be prepared to engage in combat. It’s best to bring along a ranged class (such as an Archer or Sorcerer) or a strong frontline class like the Barbarian or Paladin to handle the enemies effectively.

            Navigating the Shipwrecks: As you traverse the coastal area, you will encounter a series of shipwrecks scattered across the landscape. These shipwrecks are often occupied by hostile enemies but can also serve as a useful means of transportation. Some wrecks will provide you with safe spots to regroup, while others may have secret passages leading to loot or other helpful resources.

            Turbulent Waters Puzzle: At a certain point in the quest, you will encounter a puzzle involving a series of levers, pipes, and mechanisms designed to control the flow of water. To progress, you will need to manipulate these devices correctly to lower the water levels. If you fail to solve the puzzle in time, the rising water will block your path, forcing you to retry.

            Battling the Rogue Forces

            A significant part of the Turbulent Waters quest involves fighting off the Rogue forces, which have infiltrated the coastline. These enemies are relentless and skilled, making them a formidable opponent. The Rogues will appear in small groups, but they are tactically clever and can overwhelm you if you’re not careful.

            Use Terrain to Your Advantage: The coastline features rocky hills and cliffside spots that can be used to gain a tactical advantage over the Rogues. Use these areas for cover when needed, and position yourself where you can control the battlefield.

            Special Rogue Units: Watch out for Rogue Bosses that will appear as you continue the quest. These enemies are stronger than regular Rogue units and may have special abilities that can disorient you or knock you off your guard. Defeating them will reward you with high-quality loot, including armor and weapons that may help you later in the quest.

            Mobility and Positioning: Because the Rogue units are highly mobile, it’s essential to remain agile in combat. Use movement abilities like dodges and jumps to evade their attacks, especially their Poison Arrows or Trap Setters. These traps can slow you down, making it easier for the Rogues to overwhelm you.

            The Legendary Sea Beast Encounter

            The real turning point in the Turbulent Waters quest is the battle against a Legendary Sea Beast. This creature is one of the most challenging and rewarding bosses in the game, with devastating attacks that will require you to be both quick and strategic in your approach. The beast has two primary phases:

            The Water Phase: During this phase, the Sea Beast will attack from a distance using waves of water, summon smaller sea creatures to fight alongside it, and create whirlpools that will pull you toward dangerous areas. To survive this phase, you will need to use quick reflexes to dodge water spouts and avoid being pulled into whirlpools.

            The Beast Phase: When the Sea Beast moves onto land, it becomes far more aggressive. The creature’s tentacles will lash out in all directions, and its roar will create shockwaves that stun you. It will also summon adds (smaller monsters) to overwhelm you. Take down these adds first before focusing your attacks on the Sea Beast.

            Tips for this fight include:

            Use AoE Spells to clear out the adds quickly.

            Stay Mobile to avoid getting caught in the water spouts or stunned by the shockwaves.

            Keep Your Distance during the Beast Phase and strike when it’s vulnerable after its large attack moves.

            Completing the Quest and Rewarding Your Efforts

            Once you defeat the Sea Beast, you will be rewarded with a large amount of experience points, cheap Diablo 4 Items, and special quest-related rewards, including unique materials that you can use to upgrade your gear. The questline will also reveal more about the deeper lore of Kehjistan, and the forces working against Sanctuary.

            After defeating the Sea Beast, make sure to return to the NPC that gave you the quest to finish it and claim your reward. Be sure to check your inventory for any special items or legendary gear that you may have obtained during the battle.

            Conclusion

            The Turbulent Waters quest in Diablo 4 is a thrilling, multi-phase journey that tests your skills in combat, puzzle-solving, and environmental navigation. From traversing the dangerous coastline to battling the powerful Rogue forces and confronting the Legendary Sea Beast, the quest offers a variety of challenges that make it one of the most engaging parts of the game.

            Whether you are focused on the story or seeking to upgrade your gear and progress through the world of Sanctuary, Turbulent Waters will keep you on your toes. So gear up, prepare for battle, and embrace the challenges that await in the ever-turbulent waters of Sanctuary.

            Diablo 4: Brought to Heel Quest Walkthrough

            In the vast, hellish world of Diablo 4, players are tasked with undertaking numerous quests that will take them through nightmarish landscapes filled with dangerous enemies, ancient lore, and plenty of challenges. One such quest, Brought to Heel, is a captivating side quest that tests players’ abilities in both combat and exploration, offering valuable rewards in return. Whether you’re a seasoned veteran of the Diablo series or a newcomer to the franchise, understanding how to navigate this quest efficiently can greatly enhance your gaming experience.

            In this Diablo 4: Brought to Heel Quest Walkthrough, we will break down the quest’s objectives, provide helpful tips, and guide you through the process of completing it step by step. Whether you’re struggling with tricky enemies or searching for the best strategies to use, this article will ensure that you succeed in Brought to Heel and Diablo 4 Gold it offers.

            Overview of the Brought to Heel Quest

            Before diving into the quest itself, it’s important to understand the context and the setting in which the Brought to Heel quest takes place. The world of Sanctuary is under siege by the forces of Hell, and demons lurk in every corner. As a player in Diablo 4, you take on the role of a hero tasked with stopping the darkness that threatens to engulf the world.

            The Brought to Heel quest is a side quest that can be found in The Fractured Peaks, one of the game’s main regions. The quest revolves around a rogue demon or beast causing havoc in the area, and your objective is to bring it under control. To do so, you must track the beast, face off against tough enemies, and ultimately confront a powerful boss that threatens the peace of the region. In doing so, you’ll not only gain valuable loot but also unlock key insights into the world’s ongoing conflict between the forces of light and darkness.

            How to Start the Brought to Heel Quest

            To begin the Brought to Heel quest in Diablo 4, you need to:

            Visit the Fractured Peaks: Head over to the Fractured Peaks region, which is known for its snow-covered mountains and dangerous weather conditions. If you’re unfamiliar with this area, it will take some time to explore and understand the terrain. However, once you reach the correct area, you’ll be able to find the quest trigger.

            Find the NPC Quest Giver: Look for the NPC (Non-Playable Character) who offers the Brought to Heel quest. This character is typically located in one of the settlements or villages within the Fractured Peaks. NPCs in Diablo 4 generally have exclamation marks over their heads to signal that they have quests available for you. The Brought to Heel quest giver is usually found near the heart of the settlement or near a critical event that signals trouble within the region.

            Accept the Quest: When you approach the quest giver and interact with them, you will be presented with the details of the Brought to Heel quest. The NPC will explain the problem and ask you to track down and capture or eliminate the rogue beast causing chaos in the area. The quest will involve traveling to several locations and fighting fierce enemies.

            Quest Objectives Breakdown

            The Brought to Heel quest is divided into multiple stages, each of which presents unique challenges. Below, we break down each objective to ensure that you know exactly what needs to be done.

            Stage 1: Tracking the Beast

            Once you accept the quest, your first objective will be to track the rogue beast causing trouble in the Fractured Peaks. This involves exploring the region, seeking out clues that will lead you to its location. Keep an eye out for any tracks, scorched earth, or demonic markings on the ground, which often indicate the presence of the creature. These clues are scattered across the region and will guide you toward the beast’s lair.

            Tips for Tracking:

            Use your map: The quest tracker will mark important locations on your map, so use it frequently to guide your journey.

            Clear enemies along the way: As you make your way through the Fractured Peaks, expect to encounter hostile enemies and demons. While some may be easy to defeat, others can be more challenging, especially when faced with large groups.

            Look for environmental clues: Environmental storytelling is key in Diablo 4. You may come across torn trees, broken structures, and signs of destruction, all of which will bring you closer to finding the beast.

            Stage 2: Encounter with the Beast

            Once you’ve gathered enough clues and followed the tracks, you’ll eventually come across a den or lair where the rogue beast is hiding. At this point, you’ll have to confront it. The beast might not be a simple creature, but a demon or corrupted animal, which means you’ll have to prepare for a serious battle.

            Tips for the Encounter:

            Check your gear: Ensure that your weapons and armor are up to date before facing the beast. You may want to stock up on healing potions, scrolls, and other consumables that can aid you in the fight.

            Use crowd control abilities: The beast will likely have minions or smaller creatures accompanying it. Make sure you have crowd control abilities, such as stuns or slows, to deal with them.

            Study the boss mechanics: The rogue beast you face will likely have special attacks or phase changes during the battle. Pay attention to its movements and attack patterns to anticipate its next moves.

            Stage 3: Capturing or Defeating the Beast

            After you’ve weakened the rogue beast, you will have two possible objectives, depending on the version of the quest you’re playing. You may either capture the beast or eliminate it.

            Capturing the Beast: If you’re tasked with capturing it, you’ll need to use specific items or spells to restrain the beast. This could involve trapping the creature in a special magic cage or using net traps to immobilize it. These items will usually be found in your inventory or provided by the quest giver.

            Eliminating the Beast: If your task is to eliminate the beast, you’ll need to finish the fight by dealing the final blow. Make sure to stay vigilant during the final phase of the battle, as rogue beasts often have powerful, devastating attacks that can wipe out your health in a few hits.

            Stage 4: Returning to the Quest Giver

            Once you’ve successfully captured or eliminated the beast, the next step is to return to the quest giver. They will be waiting for you at the Fractured Peaks settlement where you initially received the quest. Upon your return, you’ll receive rewards and be congratulated for your bravery and skill.

            Tips for Returning:

            Use teleportation: To save time, you can use a teleportation device or waypoint to return quickly to the settlement.

            Check your inventory: You should also check your inventory for any additional items or loot that might have dropped during the quest. The Fractured Peaks region is known for containing powerful gear that can be a valuable asset for your character.

            Rewards for Completing the Brought to Heel Quest

            Completing the Brought to Heel quest in Diablo 4 rewards you with valuable loot, experience points, and potentially new equipment. The rewards can include:

            Gold and Experience: Completing the quest will earn you cheap D4 Gold, which can be used to upgrade your gear or purchase items from merchants. You will also gain experience points, contributing to your character’s level progression.

            Unique Gear: As with most quests in Diablo 4, Brought to Heel might reward you with special weapons, armor, or accessories. This gear is usually tailored to the type of character you are playing, and it can make a significant difference in future combat encounters.

            Quest Completion: Completing the quest also unlocks additional side quests and regions to explore, continuing the storyline of Sanctuary.

            Conclusion

            The Brought to Heel quest in Diablo 4 is a thrilling side adventure that tests your combat skills, resourcefulness, and exploration abilities. By tracking down a rogue beast and either capturing or eliminating it, you’ll not only experience exciting battles and challenges but also gain valuable rewards to aid in your overall progression.

            Whether you’re a seasoned veteran or a newcomer to the Diablo franchise, completing this quest will provide a deeper understanding of the game’s world, mechanics, and the never-ending fight against the forces of Hell. Follow the steps outlined in this walkthrough, prepare for battle, and dive into the dark heart of Sanctuary to conquer the Brought to Heel quest with confidence!