Tag Archives: Diablo 4 Items

How to Get Banished Lord’s Talisman in Diablo 4 and Its Unique Effects

Unique items continue to shape the Diablo 4 endgame, and one of the most powerful universal amulets available is the Banished Lord’s Talisman. This highly sought-after Unique item is especially popular among Overpower-focused builds thanks to its incredible damage scaling and synergy with resource-heavy Core Skills.

What Is Banished Lord’s Talisman?

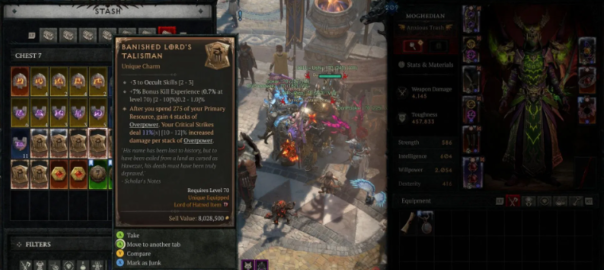
Banished Lord’s Talisman is a Unique Amulet that can be equipped by all classes in Diablo 4. The item focuses heavily on Overpower damage and guaranteed Overpower triggers through resource-spending mechanics.

The amulet is particularly valuable because it combines strong offensive affixes with one of the best damage-enhancing Unique effects currently available.

Banished Lord’s Talisman Stats

The item commonly rolls with:

·Maximum Life

·Attack Speed

·Overpower Damage

·+Ranks to Core Skills

·Resistance to All Elements

Its core Unique effect states:

“After you spend 275 of your Primary Resource, your next Core Skill is guaranteed to Overpower.” 

Additionally, Critical Strikes that Overpower deal significantly increased damage, creating massive burst potential for optimized builds.

This combination makes the amulet one of the strongest Diablo 4 Items for builds that generate and spend resources rapidly.

Why Banished Lord’s Talisman Is So Strong

The biggest strength of Banished Lord’s Talisman lies in its guaranteed Overpower mechanic.

Normally, Overpower attacks occur somewhat inconsistently unless heavily supported by specific skills or passives. This Unique item allows players to reliably trigger Overpower damage after spending enough Primary Resource.

That consistency creates enormous synergy with:

·Fury-spending Barbarian builds

·Spirit-heavy Druid builds

·Essence-focused Necromancer setups

·Mana-intensive Sorcerer Core Skills

The item becomes especially powerful when paired with Critical Strike scaling because Critical Overpowers deal massive burst damage.

Many players consider Banished Lord’s Talisman one of the best endgame Diablo 4 Items for boss-killing builds due to its incredible single-target damage potential.

Best Builds That Use Banished Lord’s Talisman

Several Season 13 builds benefit tremendously from this Unique amulet.

Hammer of the Ancients Barbarian

HotA Barbarian remains one of the strongest users of Banished Lord’s Talisman.

The build spends massive amounts of Fury quickly, allowing players to trigger guaranteed Overpowers frequently. Combined with Critical Strike scaling, HotA Barbarians can deliver devastating burst damage against bosses and elite enemies.

Pulverize Druid

Pulverize Druids also gain enormous value from the amulet.

Because Pulverize naturally synergizes with Overpower mechanics, Banished Lord’s Talisman helps amplify one of the build’s greatest strengths. Resource-heavy Earth builds especially benefit from the guaranteed Overpower trigger.

Blood Surge Necromancer

Blood Surge builds are another strong option.

Necromancers focusing on Overpower interactions can use Banished Lord’s Talisman to dramatically increase burst potential during large enemy pulls and boss encounters.

Many high-end Overpower builds now prioritize this amulet among their most important Diablo 4 Items.

How to Get Banished Lord’s Talisman in Diablo 4

Like many powerful Unique items, Banished Lord’s Talisman can be somewhat difficult to farm consistently.

However, several methods currently offer the best chances of obtaining it.

1. Duriel Farming

Recent item databases and community guides continue to recommend farming Duriel, King of Maggots, as one of the best target-farming methods for Banished Lord’s Talisman.

Duriel remains one of the premier endgame bosses for farming high-tier Diablo 4 Items.

Benefits of Duriel farming include:

·High Unique drop rates

·Strong Ancestral gear chances

·Potential Mythic Unique rewards

·Excellent endgame loot tables

Efficient boss rotations significantly improve farming speed.

2. Helltide Farming

Helltide events remain one of the best general farming activities in Diablo 4.

Opening Tortured Gift chests during Helltides can reward valuable Unique items, including Banished Lord’s Talisman.

Players typically farm:

·Cinders

·Elite enemies

·Helltide bosses

·Mystery chests

This method also provides valuable crafting materials and gold.

3. Purveyor of Curiosity Gambling

The Purveyor of Curiosity offers another possible farming method.

By gambling Murmuring Obols for amulets, players have a chance to obtain Unique amulets, including Banished Lord’s Talisman.

While RNG-heavy, this method works well alongside other farming activities.

4. Horadric Cube Crafting

Season 13 community discussions have highlighted Horadric Cube crafting as an increasingly popular way to acquire difficult-to-find Diablo 4 Items.

Several players report successfully crafting Banished Lord’s Talisman by:

·Converting common amulets into Unique items

·Using Cube recipes

·Recycling duplicate Uniques

·Upgrading Ancestral amulets

This method can help reduce RNG frustration during endgame farming.

Farming Tips for Banished Lord’s Talisman

Because the item remains relatively rare, efficiency matters.

Experienced players recommend:

·Farming Torment difficulties you clear quickly

·Running boss rotations with groups

·Saving Murmuring Obols for amulet gambling

·Using Horadric Cube crafting strategically

·Prioritizing loot density activities

Many players also choose to buy Diablo IV gold to speed up progression through:

·Boss material purchases

·Crafting upgrades

·Masterworking

·Enchanting rerolls

·Trading for optimized Diablo 4 Items

Efficient gold management becomes extremely important when chasing perfect Greater Affix gear.

Is Banished Lord’s Talisman Worth Using?

Absolutely.

Banished Lord’s Talisman remains one of the best offensive Unique amulets in Diablo 4 for Overpower-focused builds. Its guaranteed Overpower mechanic provides consistent burst damage that few other Diablo 4 Items can match.

The item is especially valuable for:

·Boss-killing builds

·Overpower setups

·High-resource Core Skill builds

·Endgame Pit pushing

·Torment farming

While some players report the item feeling extremely rare in Season 13, community discussions consistently describe it as one of the most rewarding Uniques once acquired.

Final Thoughts

Banished Lord’s Talisman is one of the strongest Unique amulets currently available in Diablo 4. By combining guaranteed Overpower mechanics with huge Critical Strike scaling, the item enables some of the highest burst damage builds in Season 13.

Diablo 4 Season 12’s Meaty Offerings: Unlock Shrines of Slaughter for Better Loot

Diablo 4 Season 12, titled “Season of Slaughter,” has arrived as a condensed yet action-packed bridge to the upcoming Lord of Hatred expansion, and at its core lies a gruesome yet rewarding mechanic: Meaty Offerings and Shrines of Slaughter. For demon slayers hungry for top-tier loot, mastering these new features is not just optional-it’s essential. These systems tie directly to the season’s theme of unrelenting carnage, offering players a path to Diablo 4 Items, powerful gear, unique rewards, and the chance to embody one of Sanctuary’s most feared foes: the Butcher.

What Are Meaty Offerings?

Meaty Offerings are the lifeblood of Season 12’s most lucrative activities. These new consumable items serve as the gateway to Shrines of Slaughter, a brand-new Helltide event that promises some of the season’s best loot drops. Unlike other consumables in Diablo 4, Meaty Offerings are not crafted or purchased-they are earned through relentless combat and seasonal activities.

Players can acquire Meaty Offerings by slaying enemies across Sanctuary, with higher-tier foes and seasonal activities yielding more of this precious resource. Whether you’re clearing nightmare dungeons, battling through Infernal Hordes, or participating in the PvP Ceremony of Slaughter, every kill brings you closer to gathering the Offerings needed to unlock Shrines of Slaughter.

The beauty of Meaty Offerings lies in their simplicity: collect them, find a Shrine of Slaughter during a Helltide, and offer them up to trigger a wave of enemies. It’s a straightforward loop, but one that rewards consistency and aggression-core tenets of Season 12’s design.

Shrines of Slaughter: A Hellish Feast for Loot Hunters

Shrines of Slaughter are not just another event-they are a high-stakes battle that tests your combat prowess while showering you with rewards. These shrines appear exclusively during Helltide events, marked by a gory, blood-stained icon that signals the promise of carnage (and loot).

When you place a Meaty Offering on a Shrine of Slaughter, the shrine activates, drawing hordes of demons to your location. These enemies are not your average foes; they are tougher, more aggressive, and designed to push you to your limits. The goal is simple: dispatch every enemy wave as quickly as possible to maximize your rewards.

What makes Shrines of Slaughter so valuable is their loot table. Unlike standard Helltide chests, these shrines have an increased chance to drop Bloodied Items-Season 12’s new gear type that scales in power with your killstreak. They also have a higher chance of dropping Ancestral Items and even the season’s new Unique Items, which are exclusive to the Butcher Lair Boss and Shrine of Slaughter events.

The Link Between Shrines of Slaughter, Killstreaks, and Better Loot

Season 12’s Killstreak system is inseparable from Shrines of Slaughter, and together they create a feedback loop that rewards nonstop combat. When you activate a Shrine of Slaughter, the waves of enemies provide the perfect opportunity to build and maintain a Killstreak, which progresses through five tiers: Killstreak, Carnage, Devastation, Bloodbath, and Massacre.

Each Killstreak tier boosts your stats-including 8% attack speed, 10% movement speed, and 8% critical strike chance per tier-and increases the quality of loot dropped by enemies in the Shrine. The higher your Killstreak, the better your chances of earning high-roll Bloodied Items, which have affixes that scale with your current tier.

Bloodied Items are a game-changer for loot hunters. These items come in three categories: Rampage (armor, offering defensive and mobility bonuses), Feast (weapons, providing combat perks), and Hunger (jewelry, boosting damage against low-health enemies). Best of all, Bloodied Items can also be Ancestral, combining two of Diablo 4’s most powerful gear qualities.

Beyond Loot: Shrines of Slaughter and the Butcher Transformation

Shrines of Slaughter offer more than just gear-they are a key step in unlocking one of Season 12’s most exciting features: becoming the Butcher. To transform into this iconic boss, players must collect Meaty Offerings, activate Shrines of Slaughter, and progress through the seasonal questline “A Taste of Power,” which begins in Gea Kul.

When you become the Butcher, your skill bar is replaced with brutal, area-of-effect abilities designed for maximum destruction. While transformed, every kill earns you Fresh Meat, a seasonal resource that can be exchanged for additional Bloodied Items. This adds another layer of reward to Shrines of Slaughter, making them a must-do activity for players looking to fully embrace the season’s theme.

Even if you don’t aim to become the Butcher, Shrines of Slaughter remain invaluable. The consistent flow of enemies ensures you can maintain long Killstreaks, earning massive amounts of experience and seasonal reputation alongside top-tier loot. This makes them ideal for both leveling and endgame progression.

Tips to Maximize Your Shrine of Slaughter Loot

To get the most out of Shrines of Slaughter, focus on building a character that excels at crowd control and fast kills. Classes like the Barbarian, Rogue, or Sorceress-with abilities that clear groups of enemies quickly-thrive in these events. Additionally, equip Bloodied Items that boost your Killstreak gains to climb tiers faster.

Timing is also key. Shrines of Slaughter are tied to Helltide events, so plan your sessions around these windows. Bring plenty of Meaty Offerings to activate multiple shrines in one Helltide, and team up with other players to clear waves faster and maintain higher Killstreaks.

Finally, don’t forget about Bloodied Sigils. Once you reach Torment I, you can use these sigils to enhance Shrine of Slaughter enemies, increasing difficulty but also boosting loot quality. For the bravest players, Bloodsoaked Sigils offer an even greater challenge-equivalent to Torment 5 or Pit Tier 100-and guarantee multiple Bloodied and Ancestral drops.

Why Shrines of Slaughter Are a Must-Do in Season 12

Season 12 is a shorter season, lasting approximately 48 days, so efficiency is key. Shrines of Slaughter offer the fastest path to high-quality loot, combining the thrill of nonstop combat with the satisfaction of earning powerful gear. Whether you’re chasing Unique Items, perfecting your Bloodied build, or preparing for the Lord of Hatred expansion, these shrines are the heart of Season 12’s endgame. At the same time, using cheap Diablo 4 materials can also help you become stronger faster.

Meaty Offerings and Shrines of Slaughter are more than just new features-they are a love letter to Diablo’s core identity: killing demons, collecting loot, and embracing the chaos. For players willing to dive into the carnage, the rewards are unparalleled. So grab your weapons, stock up on Meaty Offerings, and unlock the full potential of Shrines of Slaughter-your next legendary loot is just a wave of demons away.

Diablo 4 Season 11 Masterworking Rework Explained: Quality Changes, Costs, and Power Impact

Diablo 4 Season 11 has taken a surprisingly positive turn thanks to Blizzard’s extensive redesign of the Masterworking system. After heavy criticism of the post-PTR version-where upgrades felt expensive, restrictive, and unrewarding developers went back to the drawing board. The result is a far more powerful, flexible, and satisfying crafting system that significantly raises the value of endgame gear.

If you’re planning your Season 11 build, preparing for high-tier content, or calculating how much Obducite you’ll need, this SEO-ready guide breaks down every major Masterworking change and explains why the system is now one of the best updates Diablo 4 has seen in months.

Masterworking in Diablo 4 Season 11: How Quality Works Now

The biggest and most impactful change revolves around Quality. Previously, Masterworking granted limited bonuses that applied only to select affixes, often making the system feel underwhelming. In Season 11, Blizzard has completely reworked this approach.

The New Quality Rules

·Every point of Quality increases all affix values by 1%

·Each Masterwork upgrade grants 2-5 Qualit.y

·Maximum Quality increased to 25 (up from 20)

Instead of selectively buffing one stat, Quality now scales every affix on the item simultaneously. That means Attack Speed, Critical Strike Chance, Damage Reduction, Resource Generation, Core Skill Damage, and defensive stats all grow together.

This turns Masterworking into a universal power multiplier rather than a niche enhancement system.

Why the New Quality System Is a Massive Buff

At maximum Quality, you’re looking at a 25% increase to all affixes on a piece of gear. When combined with Tempering, Greater Affixes, Paragon bonuses, and build-defining Uniques, the results can be absurdly strong.

Even items that aren’t “perfect” drops now have real potential. A good item with the right stat profile can be elevated into a near-best-in-slot piece through focused Masterworking. This makes loot hunting far more exciting and reduces the frustration of bricked drops.

Updated Masterworking Costs: Obducite Scaling Explained

Blizzard didn’t just buff power-they also redesigned the Obducite cost structure. Instead of static upgrade costs, Masterworking expenses now scale with your current Quality level.

New Obducite Cost Breakdown

·Quality 0: 10 Obducite

·Quality 5: 25 Obducite

·Quality 15: 66 Obducite

·Quality 25: 100 Obducite

This creates a smooth progression curve where early upgrades are cheap and accessible, while high-end optimization requires commitment.

What This Means for Resource Management

·Early Masterworking is fast, cheap, and efficient

·Mid-tier upgrades require planning and a steady farm

·Pushing items past Quality 20+ is expensive and should be reserved for your best gear.r

Players running multiple builds or experimenting with weapon swaps will need to plan carefully and consider buying Diablo IV Items and materials to keep up with endgame crafting demands.

Fully Masterworked Items Gain a 50% Bonus to One Random Affi.x

The most exciting addition to Season 11 Masterworking is the final reward for fully upgrading an item.

Max Quality Bonus Explained

When an item reaches maximum Masterworking, one random affix receives a 50% bonus.

This bonus can apply to:

·Regular affixes

·Tempered affixes

·Greater affixes

·High-value hybrid or resource-focused roles

This introduces a calculated element of RNG-but one with massive upside.

Double Greater Affix Potential and Min-Maxing

Here’s where the system truly shines.

If your item:

·Already has a Greater Affi.x

·And that Greater Affix is chosen for the 50% bonus

You effectively gain a second layer of scaling on a premium stat. This creates some of the strongest items Diablo 4 has ever seen without relying on broken mechanics.

Even if the bonus lands on a Tempered Affix, the value is enormous, especially for builds that rely on conditional damage multipliers or defensive scaling.

How Masterworking Redefines Diablo 4 Season 11 Power Levels

Before these changes, many players feared Season 11 would be a regression compared to Seasons 9 and 10. Early PTR impressions suggested weaker builds, heavier grind, and limited scaling.

The reworked Masterworking system changes that narrative entirely:

·Builds now scale far harder than expected

·Gear progression feels meaningful at every stage

·Good items can be refined into god-tier equipment

·Greater Affix hunting is more rewarding than Eve

While Season 11 may not reach the most broken power levels of past metas, the gap is much smaller-and some optimized builds may end up even stronger in the long run.

Final Thoughts: Season 11 Might Be Better Than Expected

When Diablo 4 Season 11 was first revealed, expectations were low. Weak gear scaling, high crafting costs, and muted progression dominated early discussions.

Blizzard’s response has been decisive. The redesigned Masterworking system:

·Makes gear progression impactful

·Synergizes perfectly with Tempering

·Boosts every affix at once

·Encourages long-term investment in top-tier Diablo 4 items

For players who enjoy fine-tuning builds, chasing Greater Affixes, and pushing endgame efficiency, Season 11’s Masterworking overhaul may be one of the most important updates Diablo 4 has received to date.

Season 11 may not revive every past power fantasy-but it’s now positioned to be far more rewarding, engaging, and fun than anyone expected.

Diablo 4 Season 9: The Fastest Barb Build Ever

Welcome to the ultimate Barbarian farming guide for Diablo 4 Season 9. If you’re tired of grinding slowly, struggling to get Greater Affix gear, or watching Sorcerers and Rogues fly past you in dungeons, this is the build you’ve been waiting for.

This is not a casual leveling setup. This is the fastest-clearing Barbarian build in Diablo 4 right now-tuned for speed, efficiency, and loot. With it, you’ll:

·Clear content faster than any other Barb spec

·Farm hundreds of legendaries per hour

·Extract and target Greater Affix (GA) Diablo 4 Items

·Shred Pit levels 75-79 with near-perfect efficiency

·Maximize Opal income and Tribute farming

Let’s dive in.

Why This Build Exists

In Season 9, Diablo 4’s loot system has changed. Just grabbing legendaries is no longer enough-you need ancestral gear with Greater Affixes. These are the golden-star stats that make gear go from “good” to god-tier.

But here’s the problem: most players are stuck wasting time farming Tree caches, Helltides, or World Bosses with terrible GA drop rates. That’s not what this build is for.

This Barb is designed to dominate the Pit-Season 9’s best farming content. With high mobility, AoE nukes, and resource sustain, you’ll shred mobs, hoard Opals, unlock Tributes, and farm Greater Affix legendaries faster than any other class.

Core Build Concepts

This isn’t the old-school tanky bruiser Barbarian. This is a speedfarming king built around four pillars:

1. Mobility

·Leap + Charge chaining keeps you flying across the screen.

·Use terrain-breaking to skip choke points and cut run times.

2. AoE Damage

·Whirlwind with Dust Devils for constant screen-clearing.

·Alternative: Upheaval for players who prefer burst AoE nukes.

3. Buff Uptime

·Rallying Cry, War Cry, and Challenging Shout kept on cooldown reset loops.

·With cooldown reduction, you’ll be permanently buffed.

4. Resource Sustain

·Fury generation from passives, aspects, and gear ensures you never stop spinning or smashing.

Optional Utility

·Wrath of the Berserker for elite packs or bosses.

·Iron Skin as your panic button.

·Ground Stomp for stuns and Fury regen combos.

The philosophy is simple: don’t trade hits, don’t stop moving, and don’t let enemies live long enough to matter.

Gear You’ll Need

To make this build work at peak speed, you’ll need to either farm or buy Diablo 4 gear with these stats:

·Armor: Movement Speed, Cooldown Reduction, Damage Reduction (optional GA rolls ideal)

·Weapons: Strength, Critical Strike Damage, Greater Affix multipliers

·Jewelry: Fury on Hit, Resource Cost Reduction, Max Fury

Aspects:

·Dust Devil Aspect (Whirlwind AoE spam)

·Leapquake Aspect (burst on mobility chain)

·Unconstrained Aspect (Wrath uptime extender)

This gear must include Greater Affixes. Without GA items, your multipliers will feel capped, and the build won’t hit its insane speed-farming potential.

What Are Greater Affixes (GA) and Why They Matter

Greater Affixes (GA) are enhanced versions of existing stats on gear.

·Regular gear caps around item power 750.

·GA items boost rolls toward 800+.

·Each GA effectively “super-rolls” a stat, turning good bonuses into elite ones.

For Barbarians, the most valuable GA stats include:

·Critical Strike Damage

·Movement Speed

·Strength

·Fury Generation

·Cooldown Reduction

Every GA you add to your loadout compounds the build’s efficiency. That’s why GA items are mandatory for Season 9 optimization.

Where to Get Greater Affix Items

If you’re chasing GA items, these are your best sources (ranked):

1. The Pit

·Pit levels 75-79 = 500+ legendaries/hour with top GA odds.

·Bosses drop extra loot every 10 levels.

·Clear times matter more than difficulty-always aim for sub-2-minute runs.

2. Radiant Tributes

·Rare consumables that guarantee GA drops.

·Drop from high-level Nightmare Dungeons and Escalating Nightmares.

·Best way to inject guaranteed GA loot into your farm cycle.

3. Opal Gambling

·Spend 2,500 Opals = 60+ items = 2-4 GA legendaries.

·Best slots: Gloves, Offhands, Jewelry.

·Use gambling to fill gaps after Pit farming.

4. Seasonal & Whisper Caches

·Tree Caches: 7-13 legendaries, sometimes with GA.

·Seasonal Rewards: Guaranteed 1 GA ancestral per cache.

Other sources (Helltides, World Bosses, Lairs) are filler at best.

Why the Pit is the Only Endgame That Matters

Let’s be clear: The Pit is Diablo 4’s true endgame. Everything else is supplemental. Here’s why:

·XP per hour: Highest in the game.

·Opals per hour: ~7,000 consistently.

·Legendary drops per hour: 500+.

·Greater Affix chance: Best odds across all content.

·Aspects: Guaranteed when salvaging GA legendaries.

Even if you’re already geared, Pit 75-79 remains optimal:

·90-100 seconds per run.

·Minimal downtime.

·Perfect balance of speed vs. drop rate.

Above Pit 80+, drop rates improve slightly, but time per clear skyrockets, hurting legendaries/hour efficiency.

Rule of thumb: Run the highest Pit you can clear under 2 minutes.

How Pit Scaling Works

To optimize, you need to understand scaling:

·Pit 1-70: Enemies die at about the same speed.

·Pit 71+: Clear times increase ~5 seconds every 2 levels.

·Every 10 levels: Boss loot pools expand.

·Pit 79: Peak balance of rewards and efficiency.

Higher Pit = better odds, but slower clears. Stay where your Barb feels unstoppable.

Gambling Tips for Greater Affixes

Don’t waste Opals blindly. Follow these gambling rules:

1. Spend in bursts of 2,500-5,000 Opals.

2. Target slots with higher aspect density: Gloves, Offhands, Rings, Amulets.

3. Only keep:

·Items with 1+ Greater Affix.

·Items with useful aspects (to equip or extract).

·Sell, don’t salvage non-ancestral gambling gear.

·Use gold for rerolls, upgrades, and crafting.

This way, Opals are funneled into GA hunting without wasting currency.

Performance and Ping Matter

This build is tuned for speed. If your ping or system performance lags, you’ll waste farming potential.

·Play off-peak hours for smoother server stability.

·PC > console for reaction speed and loading times.

·If your ping is unstable, this build may frustrate more than reward.

Speed is everything-don’t let latency kill it.

Who Is Blizzard Designing For?

Some perspective:

·34% of Diablo 4 buyers never launched the game.

·65% never killed a World Boss.

·Less than 1% of players ever touch endgame optimization.

Blizzard builds around casuals. But this build? It’s for the hardcore outliers who want to bend Season 9’s systems to their advantage.

If you’re reading this guide, you’re already in that 1%.

Final Thoughts: Why This Barb Build Rules Season 9

To summarize:

·Clears faster than any other Barbarian build.

·Farms legendaries with GA more efficiently than anything else.

·Scales perfectly into Pit 75-79, the most rewarding content in Diablo 4.

·Lets you stockpile Opals, extract premium aspects, and craft Mythics.

·Transforms the Barb from a slow bruiser into a loot-devouring machine.

With this build, you’ll:

·Max your aspects

·Stack thousands of Opals

·Gear faster than anyone else

·Hit the gold cap effortlessly

·Craft god-tier amulets and GA armor

·Stay ahead of the meta

This isn’t just a build-it’s a farm engine that rules Diablo 4 Season 9.

Diablo 4: Horadric Spellcrafting Guide

In the world of Diablo 4, the Horadric Spellcrafting system introduces a new layer of customization and depth to the game’s already intricate combat mechanics. Through this system, players can further hone their characters’ abilities, shaping the spells, Diablo 4 Items and abilities they use in battle to match their unique playstyle. Horadric Spellcrafting, however, is not just about increasing damage output or making your character more powerful. It’s about truly tailoring your gameplay experience to suit your desires, whether you prefer to focus on survivability, damage output, or versatility.

In this comprehensive guide, we will explore Horadric Spellcrafting in detail, from its basic concepts to the more advanced intricacies. By the end, you should have a clear understanding of how to use this system to its fullest potential, empowering your character to overcome the many challenges in Diablo 4.

1. What is Horadric Spellcrafting?

Horadric Spellcrafting is an advanced system in Diablo 4 that allows players to craft and enhance spells using magical components known as Runes and Sigils. This system lets you modify your abilities in a way that’s more versatile and dynamic than traditional skill trees. While skill trees give you predefined paths for upgrading your character’s abilities, Spellcrafting adds an extra layer of customization by enabling you to apply specific modifications to your skills and spells.

The Horadric Spellcrafting system draws inspiration from the Horadrim, the ancient order of mages who were instrumental in the struggle against the Prime Evils. The Horadrim left behind many powerful secrets, and players can tap into these ancient magics by engaging in the crafting process.

The crafting process involves the use of a special Horadric Altar, where you can combine various resources to alter your existing skills. These resources include:

Runes: Magical symbols that modify the behavior of a skill. Runes are used to alter the effect, damage, duration, and other parameters of a spell.

Sigils: Special artifacts that can be used to grant powerful buffs or even completely change how a spell behaves. Sigils are rarer than Runes and have a much stronger impact on the crafting process.

By combining Runes and Sigils in different ways, you can create a wide variety of new effects for your skills, allowing for endless customization possibilities.

2. How to Access Horadric Spellcrafting

To start utilizing Horadric Spellcrafting, you first need to unlock it in the game. Here’s how you can get started:

Reach the Endgame: Horadric Spellcrafting becomes available once you reach the endgame content in Diablo 4. This ensures that only players who have invested significant time into the game can access this advanced system.

Find the Horadric Altar: The Horadric Altar is the hub for all your crafting activities. It can be found in a specific area of the endgame map. Players will have to complete specific tasks or quests to gain access to the altar.

Collect Resources: Runes and Sigils are scattered throughout the world, often as rewards for completing dungeons, quests, or defeating elite enemies. The more resources you gather, the more options you have when crafting your spells.

3. Runes: The Building Blocks of Spellcrafting

Runes are the core elements used in Horadric Spellcrafting. Each Rune has its own unique effect, and when combined with a skill, it modifies that skill’s properties. The impact of a Rune can range from simple stat boosts to major alterations in how the skill works.

Types of Runes

Elemental Runes: These Runes imbue your abilities with elemental properties such as Fire, Ice, Lightning, and Poison. For example, a Fire Rune might turn your normal fireball spell into a powerful AoE (area of effect) flame burst that leaves a burning ground effect.

Damage Runes: These Runes enhance the raw damage output of your skills. They can increase the scaling of your spells, adding bonus damage based on factors like your character’s attributes or even the number of enemies hit.

Utility Runes: Utility Runes are focused on providing additional benefits during combat. They can increase healing effects, reduce cooldowns, or add defensive capabilities to your skills. A defensive Rune could, for example, grant you a shield every time you cast a certain ability.

Control Runes: These Runes change the crowd control properties of your abilities. For instance, a Stun Rune could cause your skill to not only damage but also stun enemies in the area for a few seconds.

Crafting with Runes

When you craft with Runes, you essentially modify the base ability of your character’s skill. For example, if your character uses a basic Fireball, you might combine it with a Chain Rune to make the fireball bounce between enemies. Similarly, a Slow Rune could cause your fireball to also slow enemies in its path, providing you with more control over the battlefield.

Players can experiment with different combinations of Runes and test their outcomes. Some may seem simple, but with the right combination, they can unlock synergies that drastically change your playstyle.

4. Sigils: Powerful Modifications

Sigils are the rarest and most potent crafting items in the Horadric Spellcrafting system. Unlike Runes, which are relatively common, Sigils can have a wide range of effects and dramatically alter the behavior of your spells.

Types of Sigils

Affliction Sigils: These Sigils grant your skills the ability to inflict status ailments on enemies, such as burning, freezing, or poisoning. For example, a Frost Sigil could turn a Fireball into a Frostball that freezes enemies in its wake.

Summoning Sigils: These Sigils allow you to summon creatures or objects that assist in combat. For example, a Summon Golem Sigil might cause your Earthquake ability to summon a temporary Golem that deals additional damage and tanks enemy hits.

Ultimate Sigils: These are incredibly rare Sigils that alter an ability’s ultimate form. For instance, an Inferno Sigil could enhance your Meteor spell, transforming it from a single impact into an explosive AoE damage dealer that rains meteors across the battlefield.

Defensive Sigils: These Sigils give your character or abilities defensive buffs, such as increased armor, resistance, or healing. A Shield Sigil could cause your Barrier skill to create a massive shield that absorbs all incoming damage for a brief period.

Combining Sigils with Runes

The real power of Horadric Spellcrafting comes when you combine both Sigils and Runes. A simple Fireball can be made to bounce, chain between targets, and apply both burning and freezing effects with the right combination of Sigils and Runes. The crafting process opens up nearly endless combinations that let you tailor your character to your preferred combat style.

5. Best Practices for Horadric Spellcrafting

Now that you understand the basics of Horadric Spellcrafting, it’s time to dive into how to optimize this system for your character. Here are a few tips and best practices to get the most out of your crafting efforts:

Experiment with Synergies: Don’t just aim for raw damage; think about synergies between your skills. For example, pairing a Slow Rune with a Poison Sigil could allow you to trap enemies in a slow-moving poison field, keeping them in place long enough for your poison to do its work.

Adapt to Your Playstyle: Whether you prefer to be in the front lines, casting from a distance, or supporting your allies, Horadric Spellcrafting gives you the flexibility to tailor your skills to your preferences. If you’re more of a tanky player, for instance, you could focus on crafting defensive runes and sigils that enhance your survivability.

Resource Management: Runes and Sigils can be hard to come by, so make sure you use them wisely. You don’t need to craft every ability at once—focus on a few key skills and upgrade them incrementally as you acquire more resources.

Consider Team Composition: In group play, Horadric Spellcrafting can be used to complement your allies’ abilities. If your team lacks crowd control or healing, consider crafting spells that can fill those gaps.

Experiment with Endgame Builds: As you unlock more powerful crafting options in the late game, don’t be afraid to experiment with builds. You might discover combinations that offer even greater synergy, enabling you to unleash devastating combos or become a much more versatile support character.

6. Conclusion

Horadric Spellcrafting in Diablo 4 is an exciting addition that offers unparalleled customization for your character’s abilities. The ability to modify and craft spells with Runes and Sigils allows for immense creativity and experimentation. By unlocking the power of the Horadrim’s ancient secrets, players can create unique spellcasting builds that match their preferred playstyle and tackle the game’s challenges with new strategies and tactics, buy Diablo 4 Gold directly can help you get a faster gaming experience.

Whether you are a seasoned Diablo veteran or a newcomer to the franchise, Horadric Spellcrafting is a system that rewards experimentation and strategic thinking. Unlock the power of the Horadrim, craft your spells with care, and prepare for an unforgettable journey through Diablo 4’s dark and dangerous world.