How to Get the Imbued Heart in Old School RuneScape (OSRS)

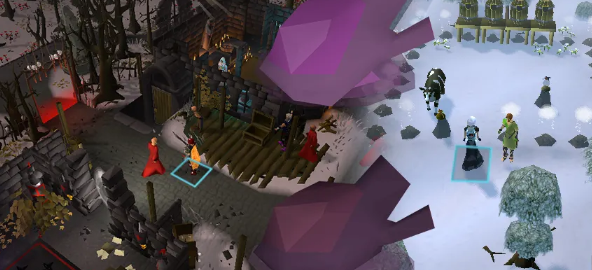
In the vast world of Old School RuneScape, certain items stand out as game-changers for players pushing into high-level content. One of the most coveted among them is the Imbued Heart, a rare drop that delivers a powerful temporary Magic boost. Whether you’re tackling raids, bossing, or late-game PvM, this item can significantly elevate your performance.

Because of its impact and rarity, the Imbued Heart has become a major goal for players, either through grinding Slayer or using accumulated OSRS gold to purchase it directly.

What Is the Imbued Heart?

The Imbued Heart is a unique item obtained through the Slayer system. When activated, it boosts your Magic level by 10% plus 1, making it extremely valuable for maximizing damage output and accuracy in combat.

This boost is especially useful in:

·High-level boss fights

·Raids like Chambers of Xeric

·Slayer boss tasks

·General PvM efficiency

The item also comes with a cooldown, but it can be reused multiple times during extended encounters, making it a reliable tool in long fights.

Because Magic scaling is crucial in endgame content, demand for the Imbued Heart remains consistently high. As a result, many players either grind extensively or buy OSRS items like this through the Grand Exchange.

Monsters That Drop the Imbued Heart

Unlike many rare items, the Imbued Heart does not drop from a single boss. Instead, it is exclusively obtained from Superior Slayer Monsters, stronger variants of regular Slayer creatures.

These superior enemies:

·Spawn randomly during Slayer tasks

·Have significantly higher combat stats

·Offer better loot tables

Some notable superior monsters that can drop the Imbued Heart include:

·Superior Abyssal Demons

·Superior Nechryael

·Superior Smoke Devils

·Superior Dust Devils

·Superior Gargoyles

·Superior Kurasks

However, there’s a catch: you must unlock the ability for superior monsters to spawn.

How to Unlock Superior Slayer Monsters

Before you can even begin farming for the Imbued Heart, you need access to superior monsters.

To unlock them:

1. Visit a Slayer Master such as Duradel or Nieve

2. Open the Slayer Rewards interface

3. Purchase the “Bigger and Badder” perk

This upgrade costs 150 Slayer points and enables superior monsters to appear randomly during Slayer tasks. Without it, the Imbued Heart is completely unobtainable through Slayer.

Understanding the Drop Rate

Here’s the reality: the Imbued Heart is extremely rare.

·Approximate drop rate: 1 in 30,000 from superior monsters

·Superior monsters themselves spawn infrequently

This double layer of rarity makes it one of the hardest Slayer drops to obtain naturally. Many players spend hundreds of hours grinding without ever seeing one.

Because of this, a large portion of the player base chooses an alternative route-earning OSRS gold through bossing, flipping, or skilling, then purchasing the item outright.

Others go a step further and buy OSRS items or resources to speed up their Slayer progress, allowing them to focus more on efficient grinding.

Best Slayer Tasks for Farming the Imbued Heart

While the drop rate itself cannot be improved, your efficiency absolutely can. The goal is simple: maximize superior monster encounters.

Here are the most effective Slayer tasks:

1. Dust Devils

Dust Devils are a top-tier task thanks to their vulnerability to Ancient Magicks. Using burst or barrage spells allows you to clear large groups quickly, increasing your chances of spawning superior variants.

2. Nechryael

Nechryael are widely considered one of the best tasks for farming. Their high density and multi-combat zones make them ideal for fast kills and efficient Slayer XP.

3. Smoke Devils

At higher Slayer levels, Smoke Devils become incredibly efficient. Their superior form, the Nuclear Smoke Devil, shares the same valuable drop table.

4. Abyssal Demons

A staple Slayer task, Abyssal Demons offer consistent kill counts and frequent opportunities for superior spawns due to their high volume per assignment.

Tips to Improve Your Chances

Even though luck plays a huge role, you can still tilt the odds in your favor with smarter strategies:

·Prioritize high-volume tasks

More kills = more chances for superior spawns

·Use AoE Magic setups

Burst and barrage spells dramatically increase efficiency

·Extend good tasks

Spend Slayer points to extend Dust Devils or Nechryael

·Block slow tasks

Avoid monsters with low kill rates or poor layouts

Over time, these optimizations can significantly increase the number of superior monsters you encounter-and with that, your chances of landing the Imbued Heart.

Buying the Imbued Heart with OSRS Gold

Given its rarity, the Imbued Heart often appears on the Grand Exchange at a steep price. For many players, grinding for weeks or months isn’t appealing.

Instead, they:

·Farm bosses like Zulrah or Vorkath for profit

·Flip items on the Grand Exchange

·Accumulate large amounts of OSRS gold

·Directly buy OSRS items like the Imbued Heart

Some players also turn to trusted marketplaces to accelerate their progress, letting them skip the grind and jump straight into high-level content.

Final Thoughts

The Imbued Heart remains one of the most prestigious and powerful Slayer drops in Old School RuneScape. Its ability to boost Magic levels makes it indispensable for serious PvM players.

If you want to obtain it naturally, be prepared for a long grind filled with Slayer tasks and a lot of patience. But if efficiency is your priority, building up OSRS gold and choosing to buy OSRS items like the Imbued Heart is a practical and widely used alternative.

At the end of the day, it comes down to your playstyle: grind for the prestige, or invest for the power.

MLB The Show 26 Settings:A Complete Guide

MLB The Show 26 is all about precision, and your settings play a major role in how well you perform. Whether you’re relaxing in offline modes or pushing for wins in Diamond Dynasty, dialing in the right configuration can noticeably improve your timing, control, and overall consistency.

Even small tweaks can make a big difference, helping you react faster, see pitches more clearly, and execute plays with confidence.

Why Settings Make a Difference

Baseball games demand sharp reactions and accurate inputs. The right setup enhances both visibility and responsiveness, allowing you to play at your best.

A well-tuned configuration can help you:

Read pitches earlier and more clearly

Improve swing timing at the plate

Deliver more accurate pitches

Minimize input delay

Adjust gameplay to suit your personal style

Many experienced players fine-tune their settings early to create a smoother experience throughout the season.

Best Batting Settings

Hitting is one of the most skill-intensive parts of the game, so optimizing your setup here is essential.

Hitting Interface

Zone Hitting is the top choice for players aiming to improve.

It gives you control over the PCI (Plate Coverage Indicator), allowing precise placement of your swing. While it takes time to master, it offers the most control and is widely used in competitive play.

Other options include:

Directional Hitting:Easier but less accurate
Timing Hitting:Focuses only on swing timing

If you’re serious about improving, Zone Hitting is the way to go.

PCI Settings

Your PCI setup directly affects how easily you can track pitches.

Suggested configuration:

PCI Center:Diamonds or Basic
PCI Inner:None or Fade
PCI Outer:None
PCI Color:Bright tones like cyan, yellow, or white

Using bright colors makes the PCI stand out against different stadium backgrounds and pitch speeds.

Batting Camera

Choosing the right camera angle improves pitch recognition and reaction time.

Popular options:

Strike Zone
Strike Zone 2
Strike Zone High

These views bring the action closer, making it easier to identify pitch types and adjust your swing.

Best Pitching Settings

Pitching success depends on control and consistency, both of which are heavily influenced by your settings.

Pitching Interface

Pinpoint Pitching is the most effective option for precision.

It rewards accurate input and timing, allowing you to consistently place pitches exactly where you want them. Once mastered, it provides the highest level of control.Turn every swing into a home run with MMOexp reliable MLB The Show 26 Stubs service—your shortcut to building a championship team.

Alternative options:

Meter Pitching
Pure Analog Pitching
Classic Pitching

These are easier to learn but don’t offer the same level of accuracy.

Pitching Camera

A clear camera angle helps you visualize pitch placement before release.

Recommended choices:

Pitcher Offset (balanced perspective)
Pitcher Zoom
Pitcher Wide

Each offers a slightly different feel, so choose the one that best suits your playstyle.

Best Fielding Settings

Strong defense is essential, especially in close games where one mistake can cost you.

Throwing Interface

Button Accuracy Throwing is the most reliable option.

It introduces a timing mechanic that improves throw precision and reduces errors, making it especially useful for double plays and long throws.

Other options include:

Button Throwing
Analog Throwing

However, Button Accuracy provides the best combination of control and consistency.

Best Baserunning Settings

Baserunning can become chaotic without proper controls, so a clean setup is important.

Recommended configuration:

Baserunning Interface:Button Select
Baserunning Decisions:Assist or Auto

This setup allows you to control individual runners efficiently, which is crucial for steals, tag-ups, and quick decisions.

Getting your settings right in MLB The Show 26 can dramatically improve your overall gameplay. From refining your batting interface to mastering pitching mechanics, every adjustment helps create a smoother, more responsive experience.Don’t let the grind slow you down—MMOexp delivers fast, safe, and affordable cheap MLB The Show 26 Stubs so you can focus on winning.

Once everything is dialed in, you’ll notice better timing, stronger control, and more consistent results—giving you a clear advantage whether you’re playing casually or competing online.

Madden 26 Game Guide – Season 7 & Team Diamond Overview

What’s up, fellas? Hope you’re having a fantastic day! Today we’re breaking down everything new in Madden 26, including Season 7, Team Diamond, flashbacks, and upcoming promos. Whether you’re looking to improve your roster quickly or save time, you might want to buy Madden 26 coins. Let’s dive in.

1. Team of the Year (TOTY) Completion Sets

· Issue Earlier Today: Completion sets were not rewarding players properly (no gold 97s or limited-time items).

· Current Status: Sets are now confirmed working. Players should receive rewards as intended.

Tips:

· TOTY completion sets are cheaper to finish now.

· You have roughly 1 month to complete them.

· Completed packs may appear in your unopened packs. Check your inbox if you finished early today.

· Recommendation: Complete these sets to get 97 overall goals or 98 limited-time players.

2. Events & Event Players

· Current Bug: No event or CPU event players are currently obtainable.

· Example: 8-0 in an online event yields 125,000 coins but no Season 6 event token.

· Advice: Skip current events until the new Ring of Honor event drops.

3. Season 7 Overview

· Field Pass Rewards: Standard Madden 26 setup. Weekly challenges are active—complete them for rewards.

· Notable Players to Max Out:

1. Brandon Marshall – 6’5” wide receiver, top-tier stats.

2. Joe Thomas – Best offensive lineman in the game.

3. Demarcus Ware – Excellent defensive lineman (non-LTD/97 gold).

4. Eric Dickerson – Good card, but not optimal to max first.

5. Tip: Every Season 7 card is worth maxing out for your team. Focus on top-tier positional upgrades first.

4. Team Diamond

· Overview: Not strictly a money grab, but some packs feel expensive. Avoid special offers with low odds.

· Best Value: $15 premium field pass offers better value than random packs.

Player Acquisition:

· Each Team Diamond player has a 99 overall limited-time and a 98 overall champion.

· 99 Limited-Time: Exchange a specific champion + 4 division tokens.

· Division Tokens: Earned by completing division-specific 98 overall sets (e.g., NFC West).

· 98 Champion: Part of sets rewarding single tier-7 ability bucket and times-two to theme team.

Recommended Players:

· Cordary Stewart – Debatably the best QB.

· Champ Bailey – Solid corner.

· Limited-time Brandon Sheriff – Worth investing if upgrading your theme team.

· Caution: Many players may not justify their coin cost for backup roles.

· Tip: Complete Team Diamond solo challenges for team builder players—they’re a cost-effective way to progress.

5. Flashbacks

· Latest Update: EA added a new catalog tab to filter newest flashbacks.

Highlights:

· 98 overall flashbacks are strong.

· Limited-time flashbacks are rare and expensive, not always the best value.

· Menu Performance: Filtering and catalog navigation have improved significantly.

6. Promo & Leak Outlook

1. Ring of Honor Promo:

· Expected tomorrow. Includes 99 overall and other tiered cards.

· Likely inductees: Calvin Johnson, Richard Sherman, Aaron Donald, Larry Allen, Mike Alott.

2. Upcoming Promos:

· Golden Tickets: Expected in 4-5 weeks, with drawing mechanics.

· All-Star Athletes: Potentially Bo Jackson, Anthony Edwards, LeBron James.

· Sugar Rush: Easter-themed promo, spring version of Christmas promo.

· Draft Promo (April): First look at 99 overall rookies; good for rookie team building.

· Madden 27 Pre-Order Bundle: Typically announced around the draft promo. Watch for the Mendoza pre-order pack.

7. General Tips

1. Max out top-tier Season 7 players first (position matters).

2. Skip current events until Ring of Honor officially launches.

3. Be cautious with packs—premium field pass is more reliable than Team Diamond special packs.

4. Complete solo challenges for team builder players—they’re cheap and effective.

5. Monitor leaks for upcoming promos like Golden Tickets, Sugar Rush, and Draft to plan coins and purchases.

Conclusion

Season 7 and Team Diamond provide exciting opportunities for roster upgrades, but patience is key. Focus on high-value cards, complete your field pass and solo challenges, and if you want to accelerate your progress, you can buy cheap Madden nfl 26 coins from trusted sources like MMOEXP to get a leg up. Madden 26 has a big few weeks ahead with Ring of Honor and other promos incoming.

Diablo 4 Season 12’s Meaty Offerings: Unlock Shrines of Slaughter for Better Loot

Diablo 4 Season 12, titled “Season of Slaughter,” has arrived as a condensed yet action-packed bridge to the upcoming Lord of Hatred expansion, and at its core lies a gruesome yet rewarding mechanic: Meaty Offerings and Shrines of Slaughter. For demon slayers hungry for top-tier loot, mastering these new features is not just optional-it’s essential. These systems tie directly to the season’s theme of unrelenting carnage, offering players a path to Diablo 4 Items, powerful gear, unique rewards, and the chance to embody one of Sanctuary’s most feared foes: the Butcher.

What Are Meaty Offerings?

Meaty Offerings are the lifeblood of Season 12’s most lucrative activities. These new consumable items serve as the gateway to Shrines of Slaughter, a brand-new Helltide event that promises some of the season’s best loot drops. Unlike other consumables in Diablo 4, Meaty Offerings are not crafted or purchased-they are earned through relentless combat and seasonal activities.

Players can acquire Meaty Offerings by slaying enemies across Sanctuary, with higher-tier foes and seasonal activities yielding more of this precious resource. Whether you’re clearing nightmare dungeons, battling through Infernal Hordes, or participating in the PvP Ceremony of Slaughter, every kill brings you closer to gathering the Offerings needed to unlock Shrines of Slaughter.

The beauty of Meaty Offerings lies in their simplicity: collect them, find a Shrine of Slaughter during a Helltide, and offer them up to trigger a wave of enemies. It’s a straightforward loop, but one that rewards consistency and aggression-core tenets of Season 12’s design.

Shrines of Slaughter: A Hellish Feast for Loot Hunters

Shrines of Slaughter are not just another event-they are a high-stakes battle that tests your combat prowess while showering you with rewards. These shrines appear exclusively during Helltide events, marked by a gory, blood-stained icon that signals the promise of carnage (and loot).

When you place a Meaty Offering on a Shrine of Slaughter, the shrine activates, drawing hordes of demons to your location. These enemies are not your average foes; they are tougher, more aggressive, and designed to push you to your limits. The goal is simple: dispatch every enemy wave as quickly as possible to maximize your rewards.

What makes Shrines of Slaughter so valuable is their loot table. Unlike standard Helltide chests, these shrines have an increased chance to drop Bloodied Items-Season 12’s new gear type that scales in power with your killstreak. They also have a higher chance of dropping Ancestral Items and even the season’s new Unique Items, which are exclusive to the Butcher Lair Boss and Shrine of Slaughter events.

The Link Between Shrines of Slaughter, Killstreaks, and Better Loot

Season 12’s Killstreak system is inseparable from Shrines of Slaughter, and together they create a feedback loop that rewards nonstop combat. When you activate a Shrine of Slaughter, the waves of enemies provide the perfect opportunity to build and maintain a Killstreak, which progresses through five tiers: Killstreak, Carnage, Devastation, Bloodbath, and Massacre.

Each Killstreak tier boosts your stats-including 8% attack speed, 10% movement speed, and 8% critical strike chance per tier-and increases the quality of loot dropped by enemies in the Shrine. The higher your Killstreak, the better your chances of earning high-roll Bloodied Items, which have affixes that scale with your current tier.

Bloodied Items are a game-changer for loot hunters. These items come in three categories: Rampage (armor, offering defensive and mobility bonuses), Feast (weapons, providing combat perks), and Hunger (jewelry, boosting damage against low-health enemies). Best of all, Bloodied Items can also be Ancestral, combining two of Diablo 4’s most powerful gear qualities.

Beyond Loot: Shrines of Slaughter and the Butcher Transformation

Shrines of Slaughter offer more than just gear-they are a key step in unlocking one of Season 12’s most exciting features: becoming the Butcher. To transform into this iconic boss, players must collect Meaty Offerings, activate Shrines of Slaughter, and progress through the seasonal questline “A Taste of Power,” which begins in Gea Kul.

When you become the Butcher, your skill bar is replaced with brutal, area-of-effect abilities designed for maximum destruction. While transformed, every kill earns you Fresh Meat, a seasonal resource that can be exchanged for additional Bloodied Items. This adds another layer of reward to Shrines of Slaughter, making them a must-do activity for players looking to fully embrace the season’s theme.

Even if you don’t aim to become the Butcher, Shrines of Slaughter remain invaluable. The consistent flow of enemies ensures you can maintain long Killstreaks, earning massive amounts of experience and seasonal reputation alongside top-tier loot. This makes them ideal for both leveling and endgame progression.

Tips to Maximize Your Shrine of Slaughter Loot

To get the most out of Shrines of Slaughter, focus on building a character that excels at crowd control and fast kills. Classes like the Barbarian, Rogue, or Sorceress-with abilities that clear groups of enemies quickly-thrive in these events. Additionally, equip Bloodied Items that boost your Killstreak gains to climb tiers faster.

Timing is also key. Shrines of Slaughter are tied to Helltide events, so plan your sessions around these windows. Bring plenty of Meaty Offerings to activate multiple shrines in one Helltide, and team up with other players to clear waves faster and maintain higher Killstreaks.

Finally, don’t forget about Bloodied Sigils. Once you reach Torment I, you can use these sigils to enhance Shrine of Slaughter enemies, increasing difficulty but also boosting loot quality. For the bravest players, Bloodsoaked Sigils offer an even greater challenge-equivalent to Torment 5 or Pit Tier 100-and guarantee multiple Bloodied and Ancestral drops.

Why Shrines of Slaughter Are a Must-Do in Season 12

Season 12 is a shorter season, lasting approximately 48 days, so efficiency is key. Shrines of Slaughter offer the fastest path to high-quality loot, combining the thrill of nonstop combat with the satisfaction of earning powerful gear. Whether you’re chasing Unique Items, perfecting your Bloodied build, or preparing for the Lord of Hatred expansion, these shrines are the heart of Season 12’s endgame. At the same time, using cheap Diablo 4 materials can also help you become stronger faster.

Meaty Offerings and Shrines of Slaughter are more than just new features-they are a love letter to Diablo’s core identity: killing demons, collecting loot, and embracing the chaos. For players willing to dive into the carnage, the rewards are unparalleled. So grab your weapons, stock up on Meaty Offerings, and unlock the full potential of Shrines of Slaughter-your next legendary loot is just a wave of demons away.

ARC Raiders Shrouded Sky Quests Guide: Why “Worth Your Salt” Frustrates Players

The Shrouded Sky update brought a fresh batch of objectives to ARC Raiders, expanding its slow-burn narrative and giving players new reasons to drop into the frozen wastelands. While the update introduced interesting story threads and new opportunities to collect valuable ARC Raiders Items, it also revived one of the game’s most frustrating design quirks: once-per-raid quest objectives.

If you’ve been attempting to complete “Worth Your Salt” or similar tasks, you’ve likely run into the same immersion-breaking problem. In this guide, we’ll break down how these quests work, why they’re frustrating, and how to optimize your runs to complete them efficiently-while maximizing your loot and progression.

How Quests Work in ARC Raiders

Unlike traditional RPGs, ARC Raiders is an extraction shooter first and foremost. Quests are secondary to survival, scavenging, and building your stash back in Speranza. Most missions follow a straightforward loop:

·Visit a specific map location

·Interact with an object

·Retrieve or deposit an item

·Extract safely

Along the way, you’ll collect high-value ARC Raiders Items, gather crafting components, and occasionally unlock progression paths that let you buy ARC Raiders Blueprints for advanced gear.

The issue arises when quests rely on shared, server-side objectives that only one player can complete per raid.

The Core Problem: Once-Per-Raid Objectives

Since launch, certain quests have featured objectives that can only be completed once per server session. A notable early example was “Keeping the Memory,” where players had to return a fallen helmet to a memorial site. If another Raider placed the helmet before you arrived, the objective was locked out for the rest of the raid.

The Shrouded Sky update introduced a similar bottleneck with the quest “Worth Your Salt.”

What You Have to Do:

1. Locate a prototype battery.

2. Charge it.

3. Deposit it into a designated drop-off container.

While multiple batteries spawn, there is only one valid drop-off slot per raid. If another player deposits a charged battery before you do, your attempt fails-even if you did everything correctly.

This design forces players into a frustrating cycle of repeat raids.

Why “Worth Your Salt” Is So Frustrating

At first, it seems manageable. You fail once, loot some gear, and try again. But after multiple attempts, the quest becomes more about racing other players than surviving ARC threats.

Many players report needing 5-8 raids to complete it successfully. That means:

· Running minimal gear to reduce risk

·Using Adrenaline Shots for speed

·Prioritizing the objective over loot

·Hoping for a fresh lobby

Instead of naturally progressing through raids and collecting valuable ARC Raiders Items, players are pressured into hyper-focused, high-risk speed runs.

The Immersion Problem

Beyond frustration, once-per-raid quests break immersion.

In the game’s fiction, Celeste assigns you the task. Other Raiders are just fellow scavengers. It doesn’t make narrative sense that your specific mission can be completed by someone else first. If the battery has already been deposited, why would you still need to do it?

This contradiction chips away at the game’s atmospheric storytelling. While ARC Raiders requires some suspension of disbelief-especially in friendly solo lobbies-these shared objectives feel mechanically artificial rather than narratively justified.

How to Complete “Worth Your Salt” Efficiently

Until Embark Studios adjusts the design, here are practical strategies to improve your success rate.

1. Prioritize Spawn Routes

Learn the fastest routes to the battery spawn and charging location. Efficiency matters more than combat.

2. Run Lightweight Loadouts

Bring only essential weapons and healing. The goal is speed, not full map domination.

3. Bring Mobility Boosts

Adrenaline Shots and stamina-focused gear can give you the edge in reaching the deposit container first.

4. Avoid Prolonged Fights

Every firefight slows you down and increases the chance that another Raider completes the objective.

5. Convert Failed Runs into Profit

If you miss the objective, pivot immediately. Farm high-value ARC Raiders Items in nearby zones, extract safely, and fund your next attempt.

Turning Frustration Into Progress

Even if the quest fails, each run doesn’t have to be wasted.

The Shrouded Sky update introduced additional loot opportunities, meaning you can still come away with valuable mechanical parts, electronics, and crafting components. These are crucial for upgrading your gear and unlocking new crafting paths.

Accumulating materials allows you to buy ARC Raiders BluePrints that unlock stronger weapons, armor mods, and utility items. In the long term, improving your loadout efficiency makes future quest attempts easier.

Why This Design Choice Exist

It’s possible the once-per-raid system is a technical limitation rather than a deliberate frustration mechanic. Server-side object tracking likely treats quest items like standard loot-meaning only one player can interact with them at a time.

Given the developer’s focus on exploit prevention and balance, quest adjustments may be lower priority. However, community feedback suggests this is a recurring pain point that could impact long-term player satisfaction.

The Bigger Picture for ARC Raiders

Despite these frustrations, ARC Raiders remains compelling because of its:

·High-stakes extraction gameplay

·Engaging scavenging economy

·Strategic inventory management

·Ongoing narrative updates

Quests are only one layer of the experience. For many players, the real progression comes from building wealth, stockpiling ARC Raiders Items, and unlocking better crafting options.

Still, when certain objectives stand out as disproportionately annoying, they risk overshadowing otherwise solid content.

Final Thoughts

The Shrouded Sky update added meaningful narrative momentum to ARC Raiders, but quests like “Worth Your Salt” highlight a design flaw that disrupts pacing and immersion.

If you’re struggling with once-per-raid objectives:

·Plan your run strategically

·Optimize for speed

·Extract with profit if you fail

·Invest your gains to buy ARC Raiders BluePrints and improve future attempts

Until adjustments are made, preparation and efficiency are your best tools.

Extraction shooters thrive on tension-but that tension should come from enemies and risk, not from racing other players to a single interaction point. Hopefully, future updates refine this system and allow quests to complement, rather than compete with, the core ARC Raiders experience.